SAML Authentication setup
Setting up SAML (Security Assertion Markup Language) will allow your team members to quickly log in to the team CloudKarafka account using the credentials stored in your organization’s Identity Provider (IdP).
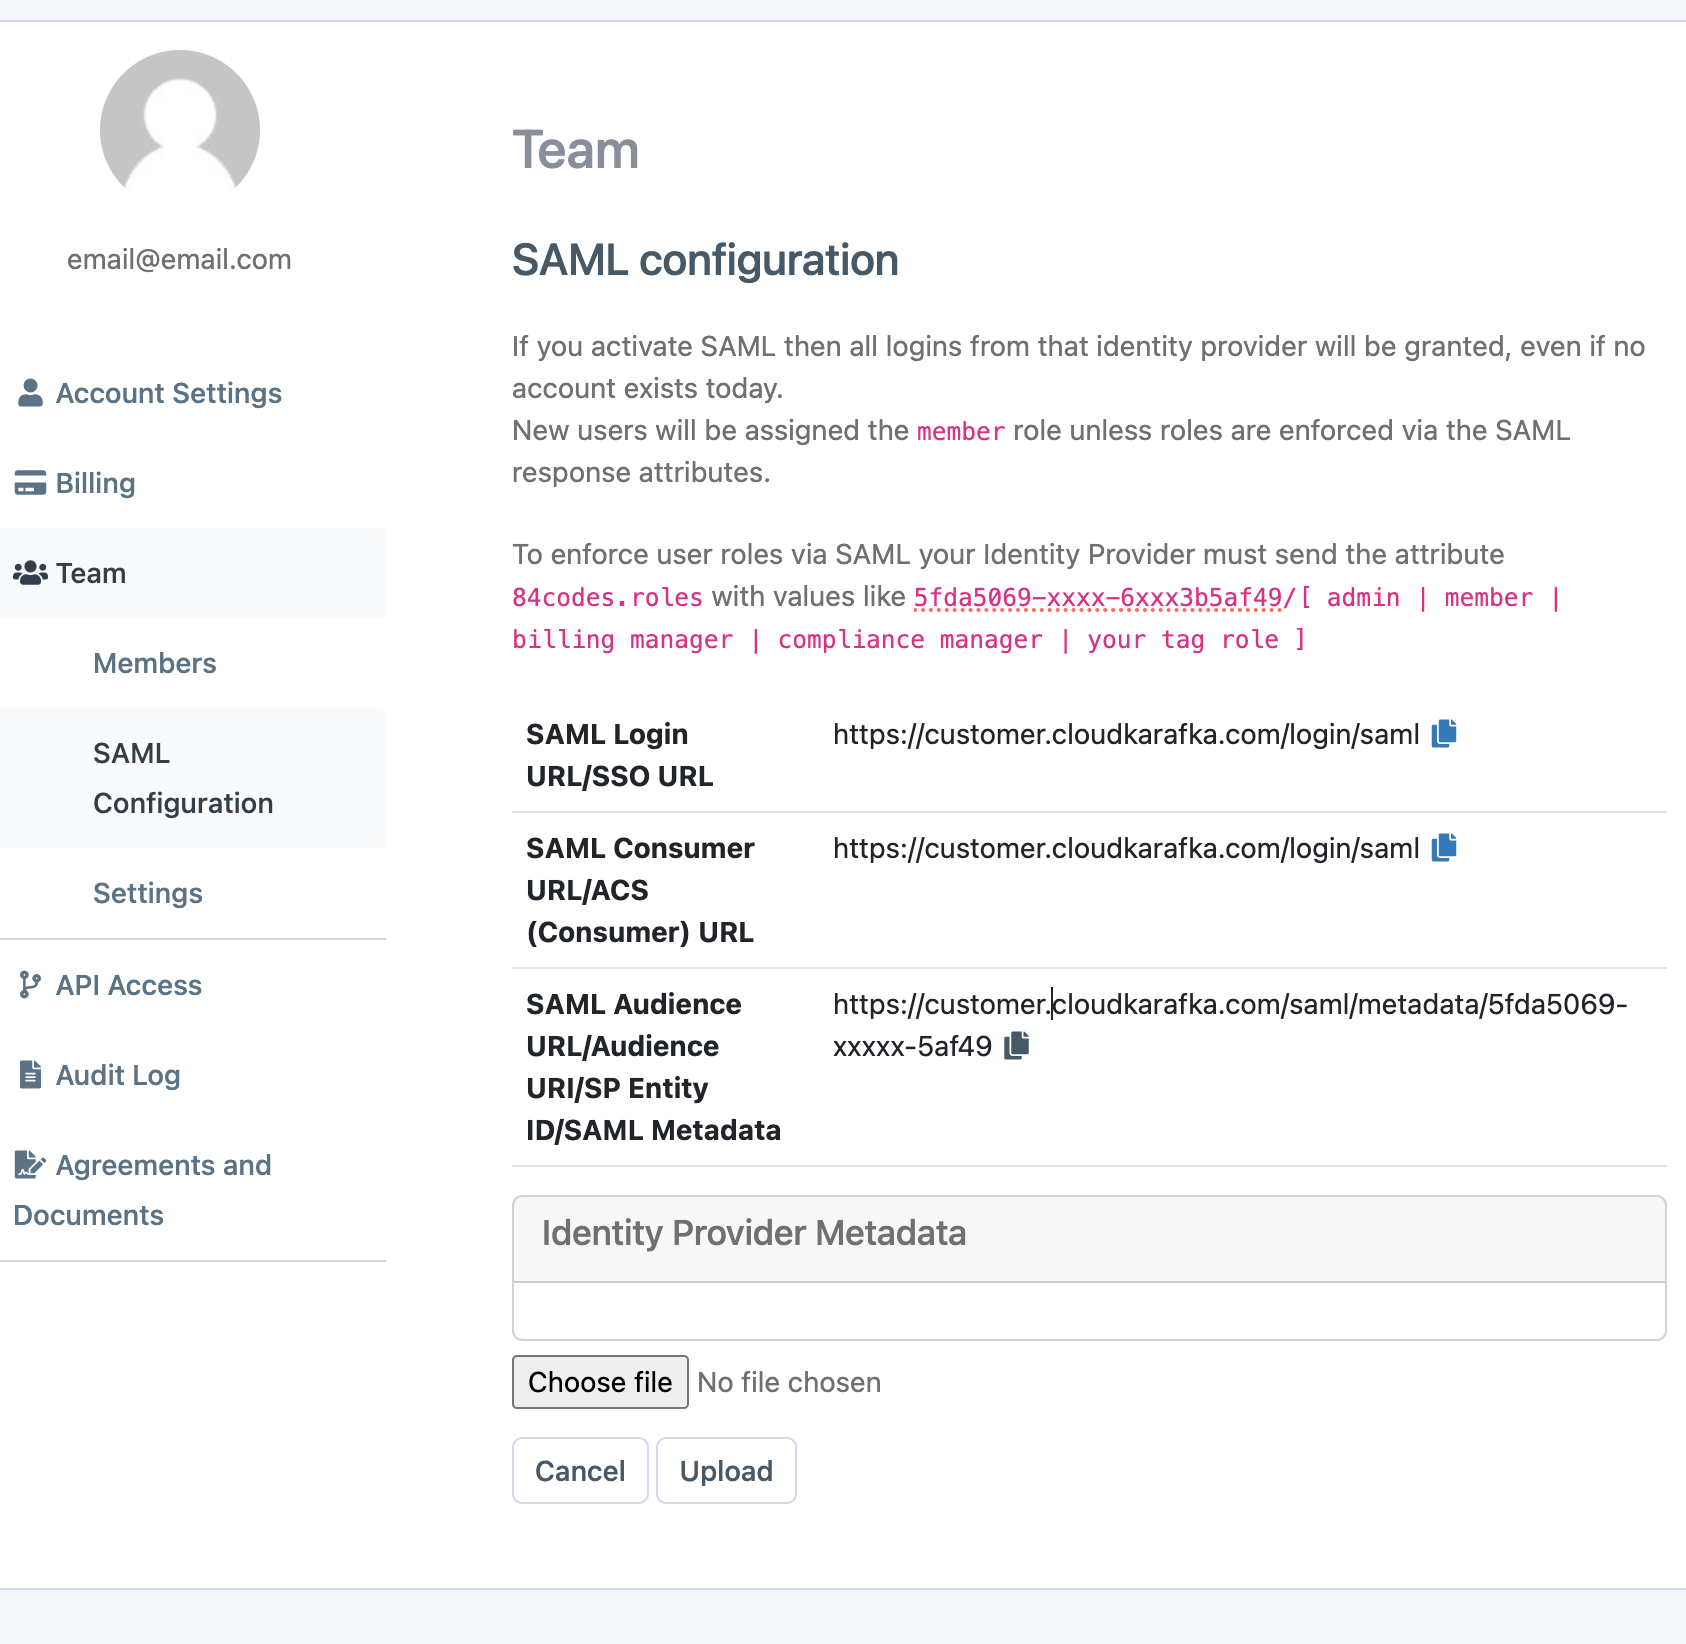
In the CloudKarafka Console under Team Settings and the tab SAML you will find the information needed for setting up and where to upload your IdP metadata. https://customer.cloudkarafka.com/team/saml
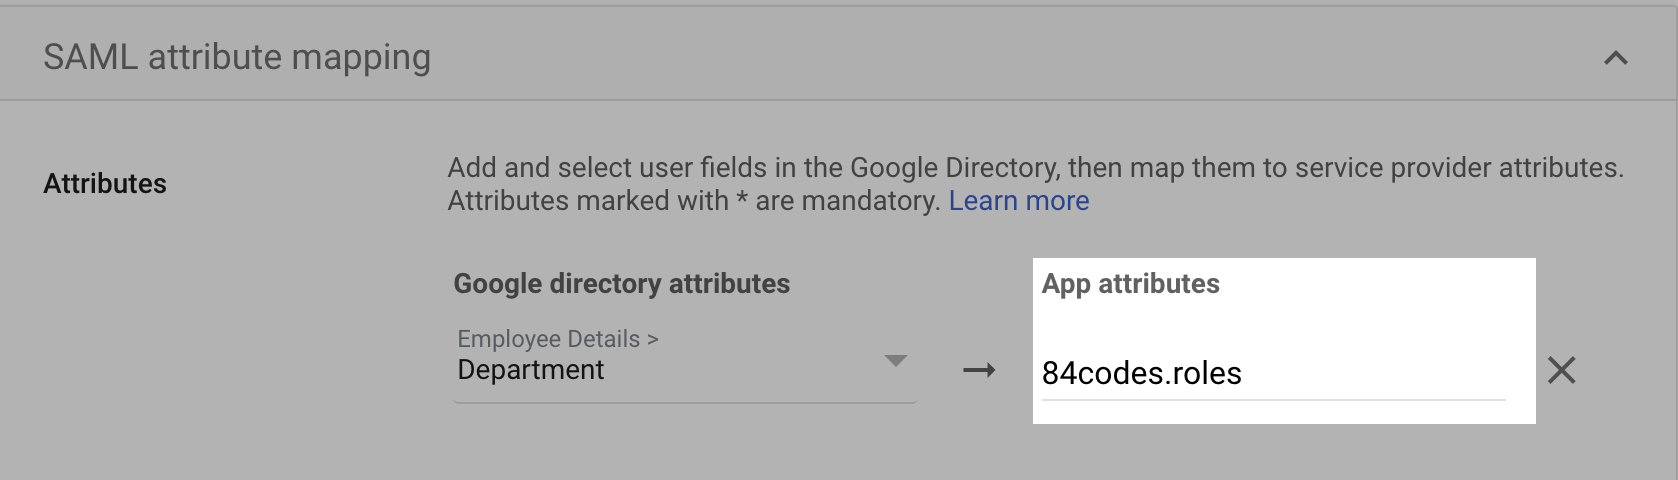
To enforce specific roles, your IdP must send an extra 84codes.roles attribute in the SAML response. You can see some examples on your SAML page above.
When SAML has been configured, the first login for any new accounts will have to be initiated from your IdP. You will not be able to sign in for the first time using the 'Sign in with SAML' on the CloudKarafka login page. Instead, you need to log in through the application created in your SAML provider.
This guide will provide step-by-step instructions on configuring SAML for the most popular IdPs:
- Okta
- Azure Active Directory (Azure AD)
- Google Workspace
Okta - SAML login on CloudKarafka
-
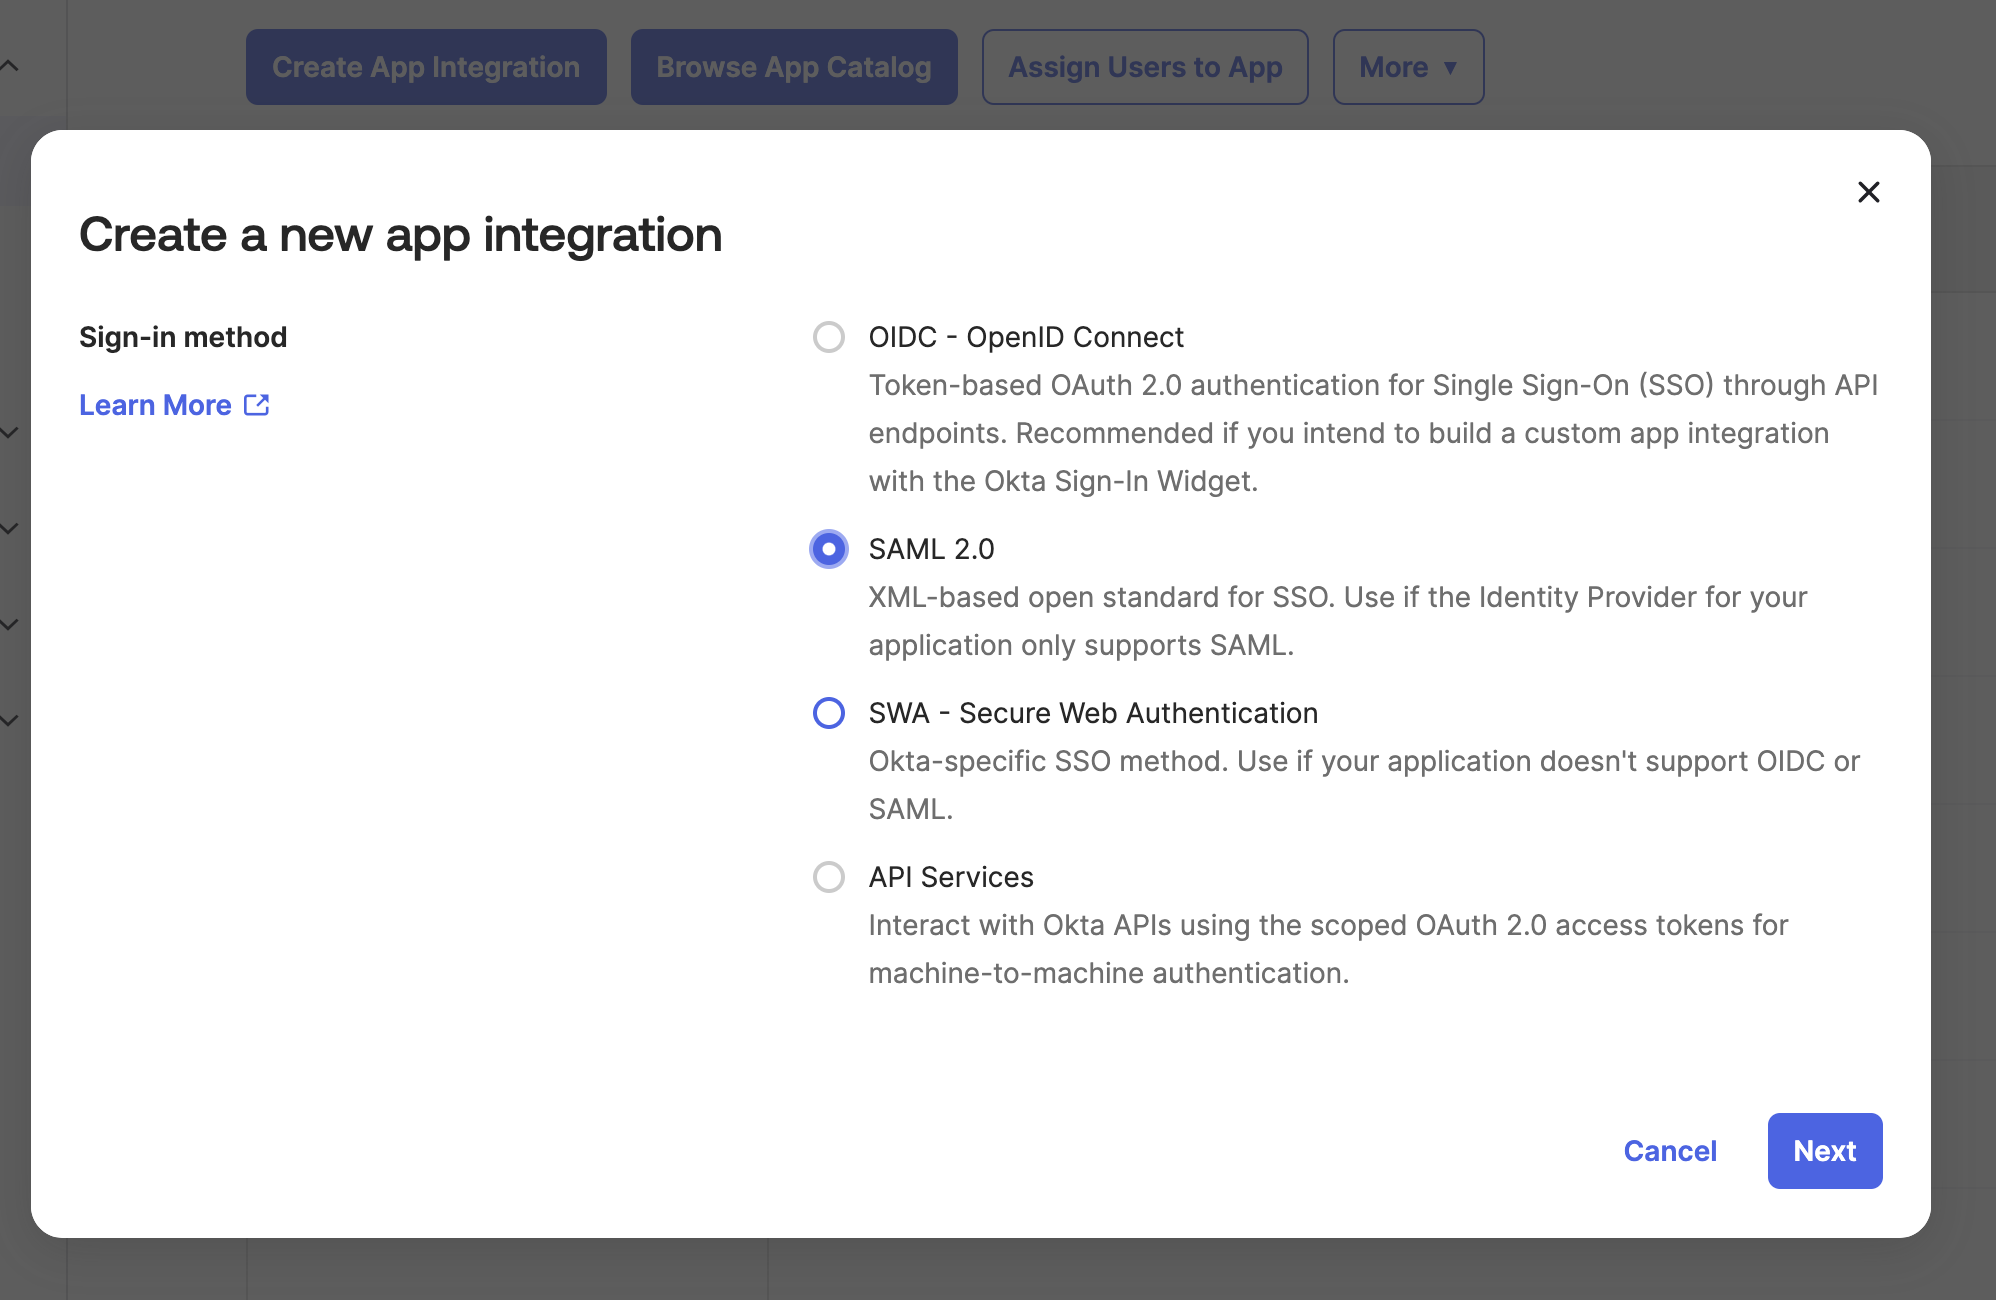
In the /admin/dashboard go to applications - applications in the side menu
-
Click “Create App Integration” and in the pop-up window choose SAML 2.0 and click next
-
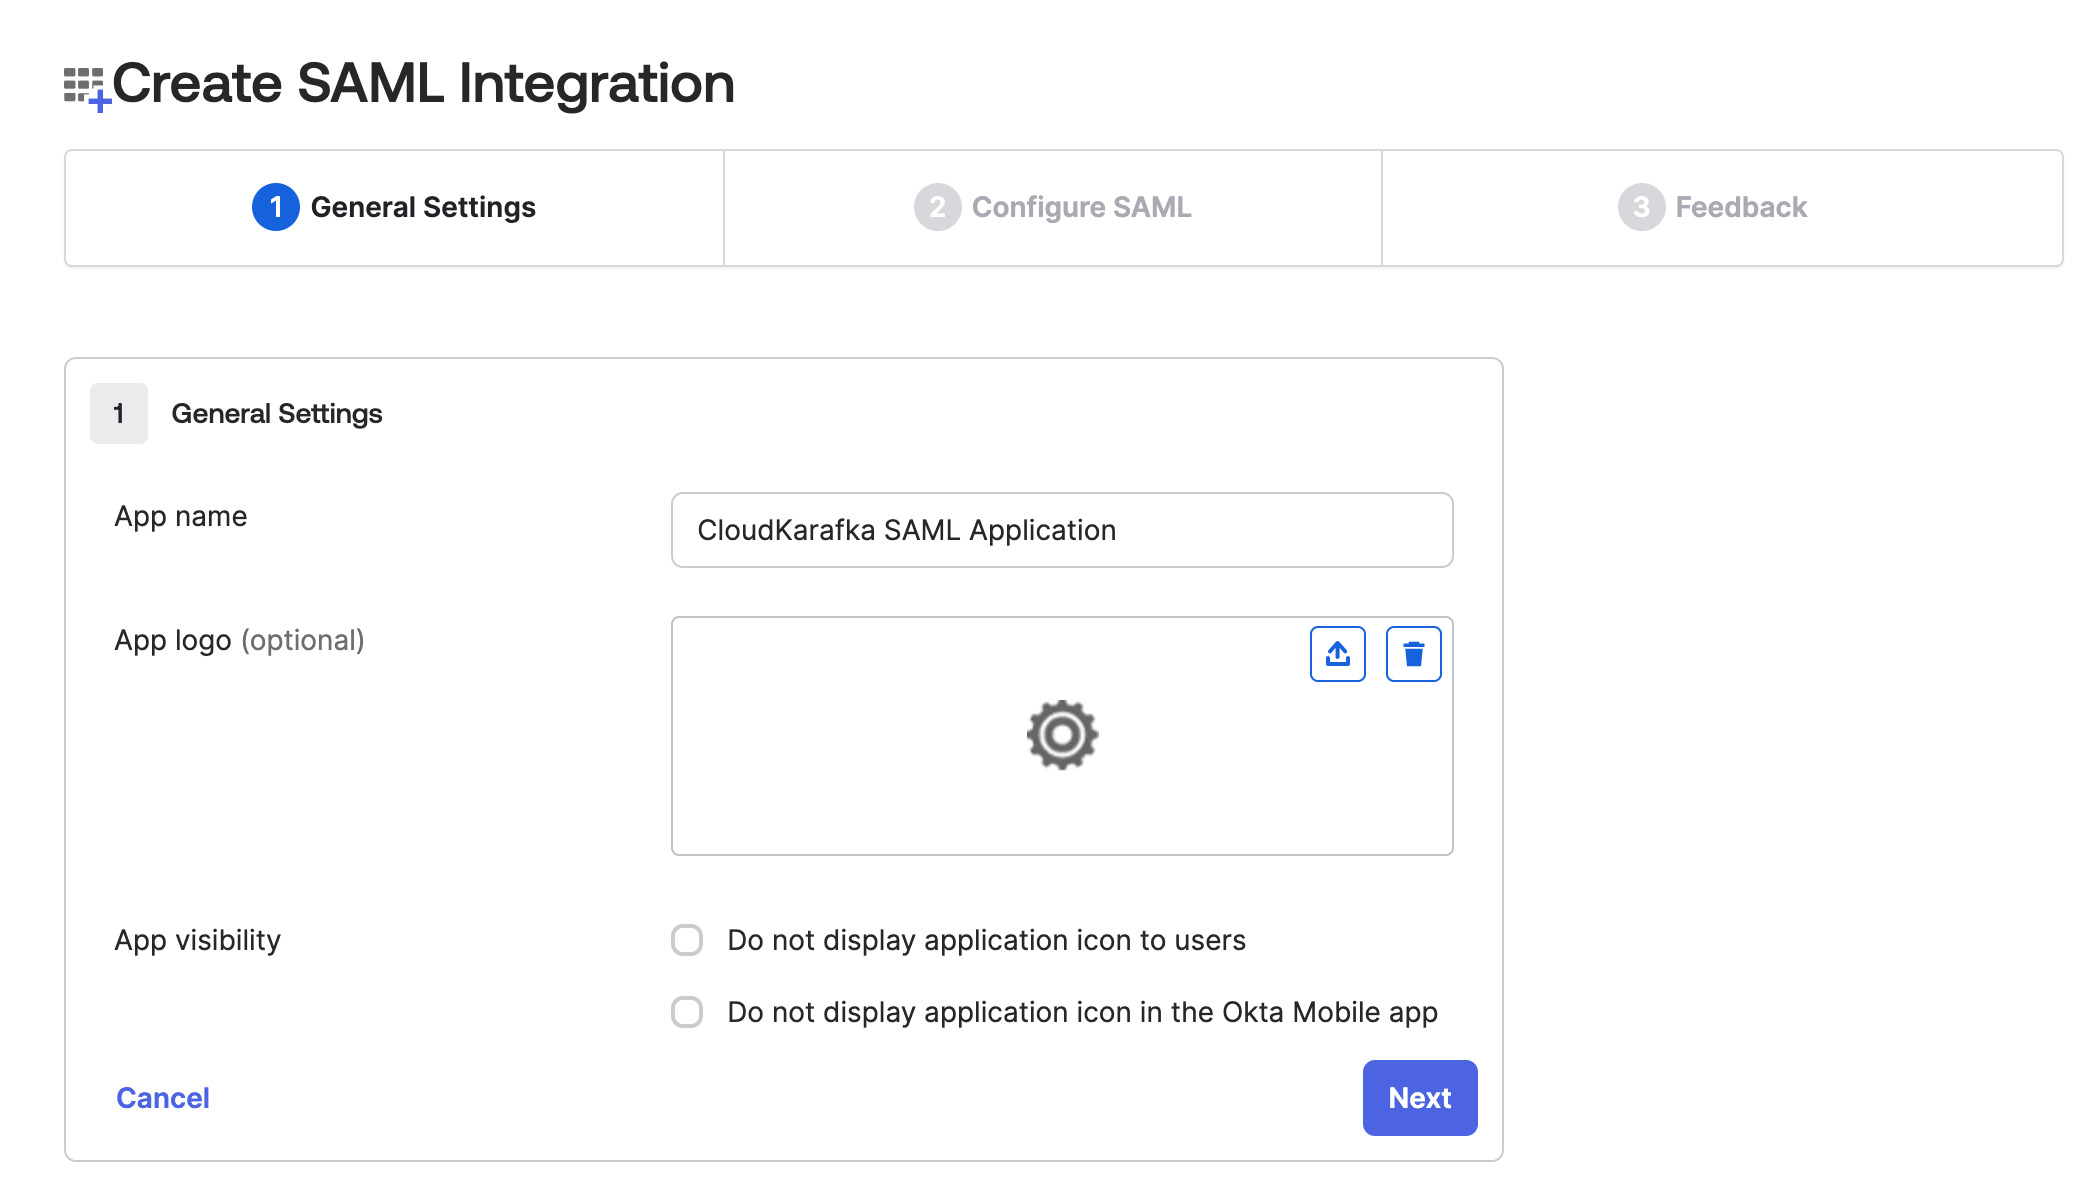
Start with giving the app integration between OKTA and CloudKarafka a name, and if you wish a logo, and click Next.
-
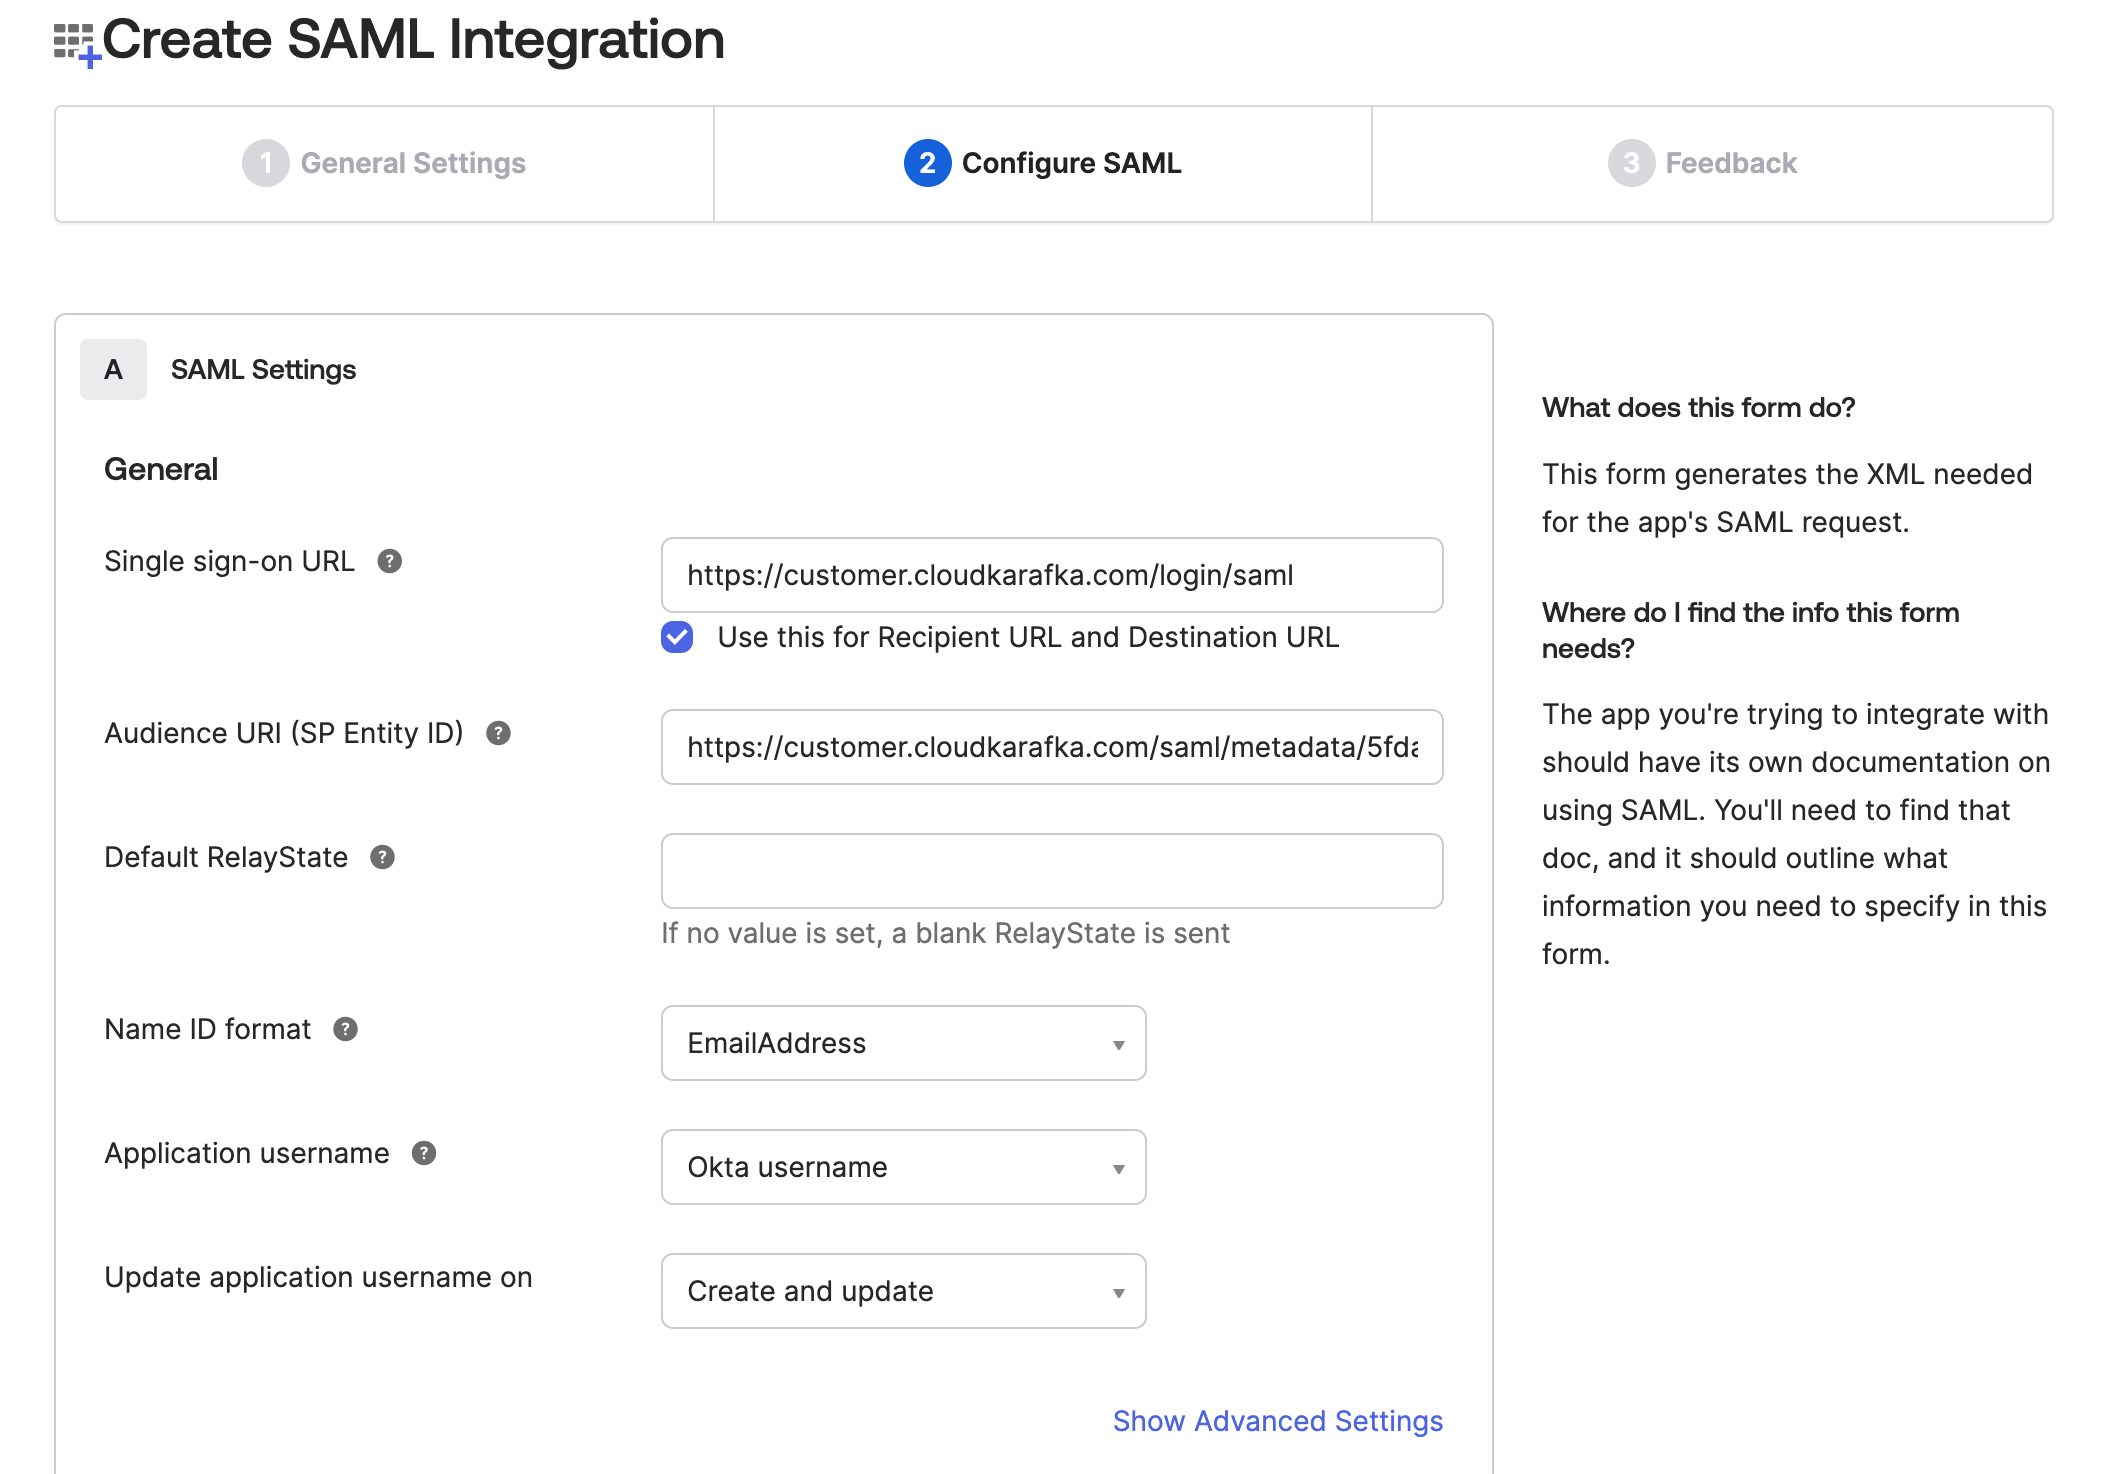
In the configuration step, fill in the following:
- In the Single sign on URL field, enter https://customer.cloudkarafka.com/login/saml and check the box Use this for Recipient URL and Destination URL
- For Audience URI (SP Entity ID), go to https://customer.cloudkarafka.com/team/saml and copy your SAML Audience URL/Audience URI/SP Entity ID/SAML Metadata to this field.
- In the field Name ID format pick EmailAddress from the dropdown list.
-
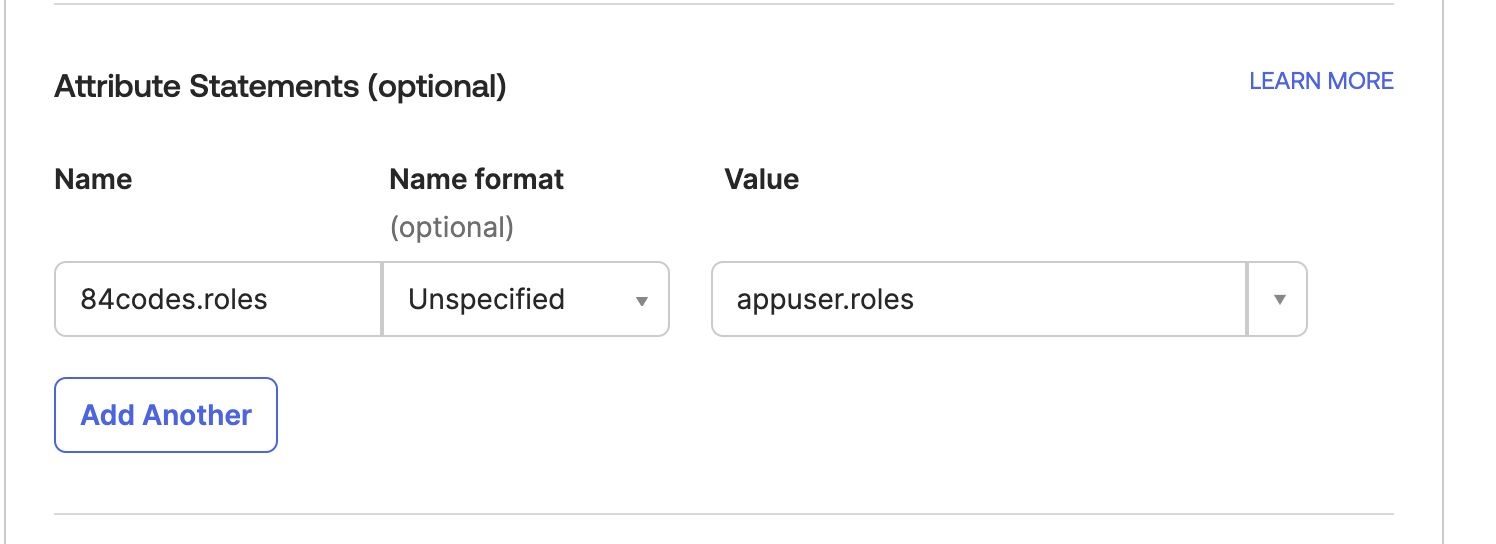
If you wish to assign the users CloudKarafka roles in OKTA, do the following.
-
In the same view under the section Attribute Statements (optional) enter 84codes.roles under name and appuser.roles under value Then continue with the following steps INCLUDING step 10
-
-
Click Next to leave the configuration step
-
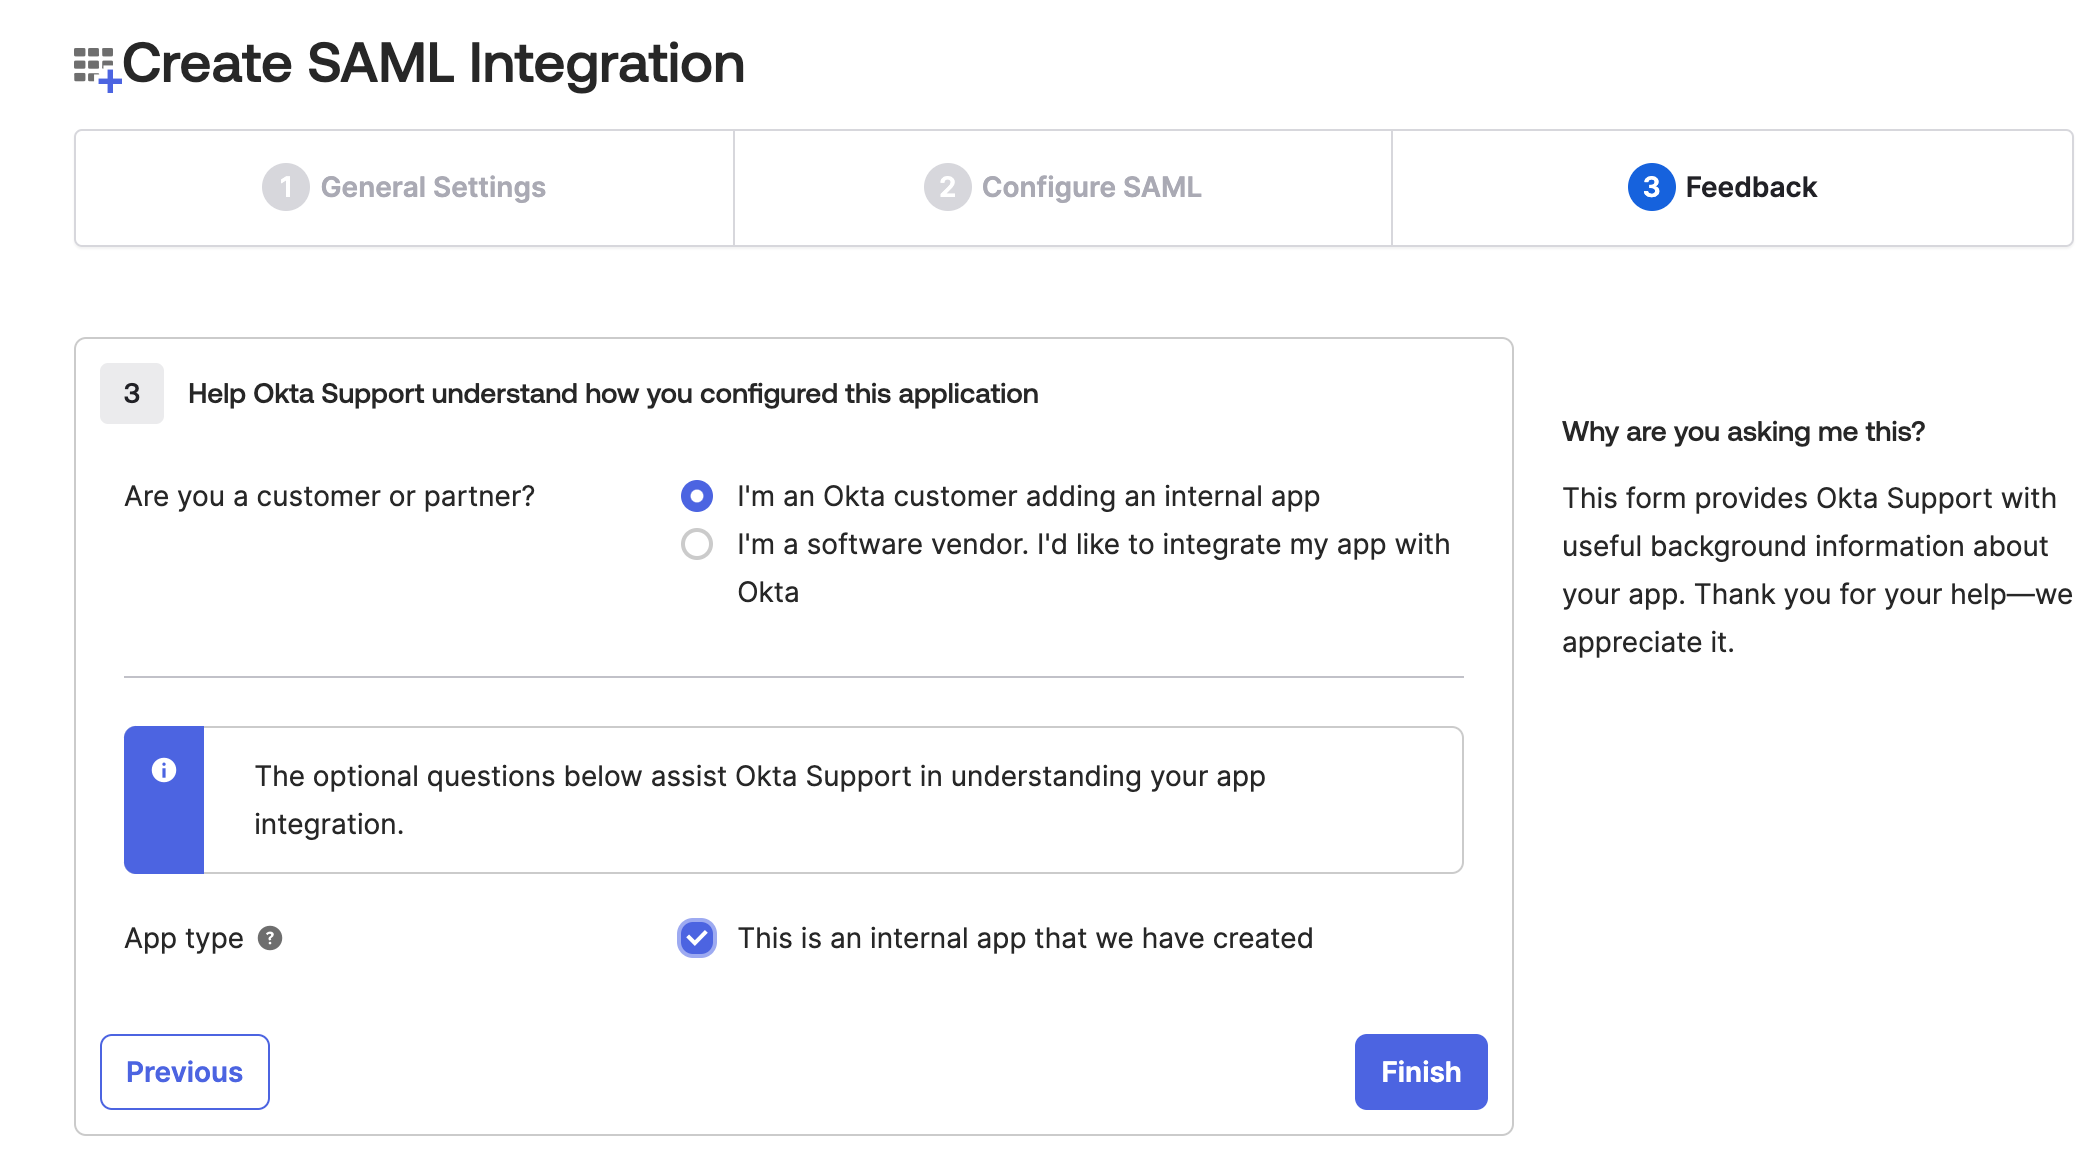
In the step Feedback select I'm an Okta customer adding an internal app, and This is an internal app that we have created, then click Finish
-
The IdP Metadata now has to be uploaded to https://customer.cloudkarafka.com/team/saml.
-
To find the metadata click go to the Sign On tab in your Application you’ve just created. Under SAML Signing Certificates section click Action next to the active certificate.
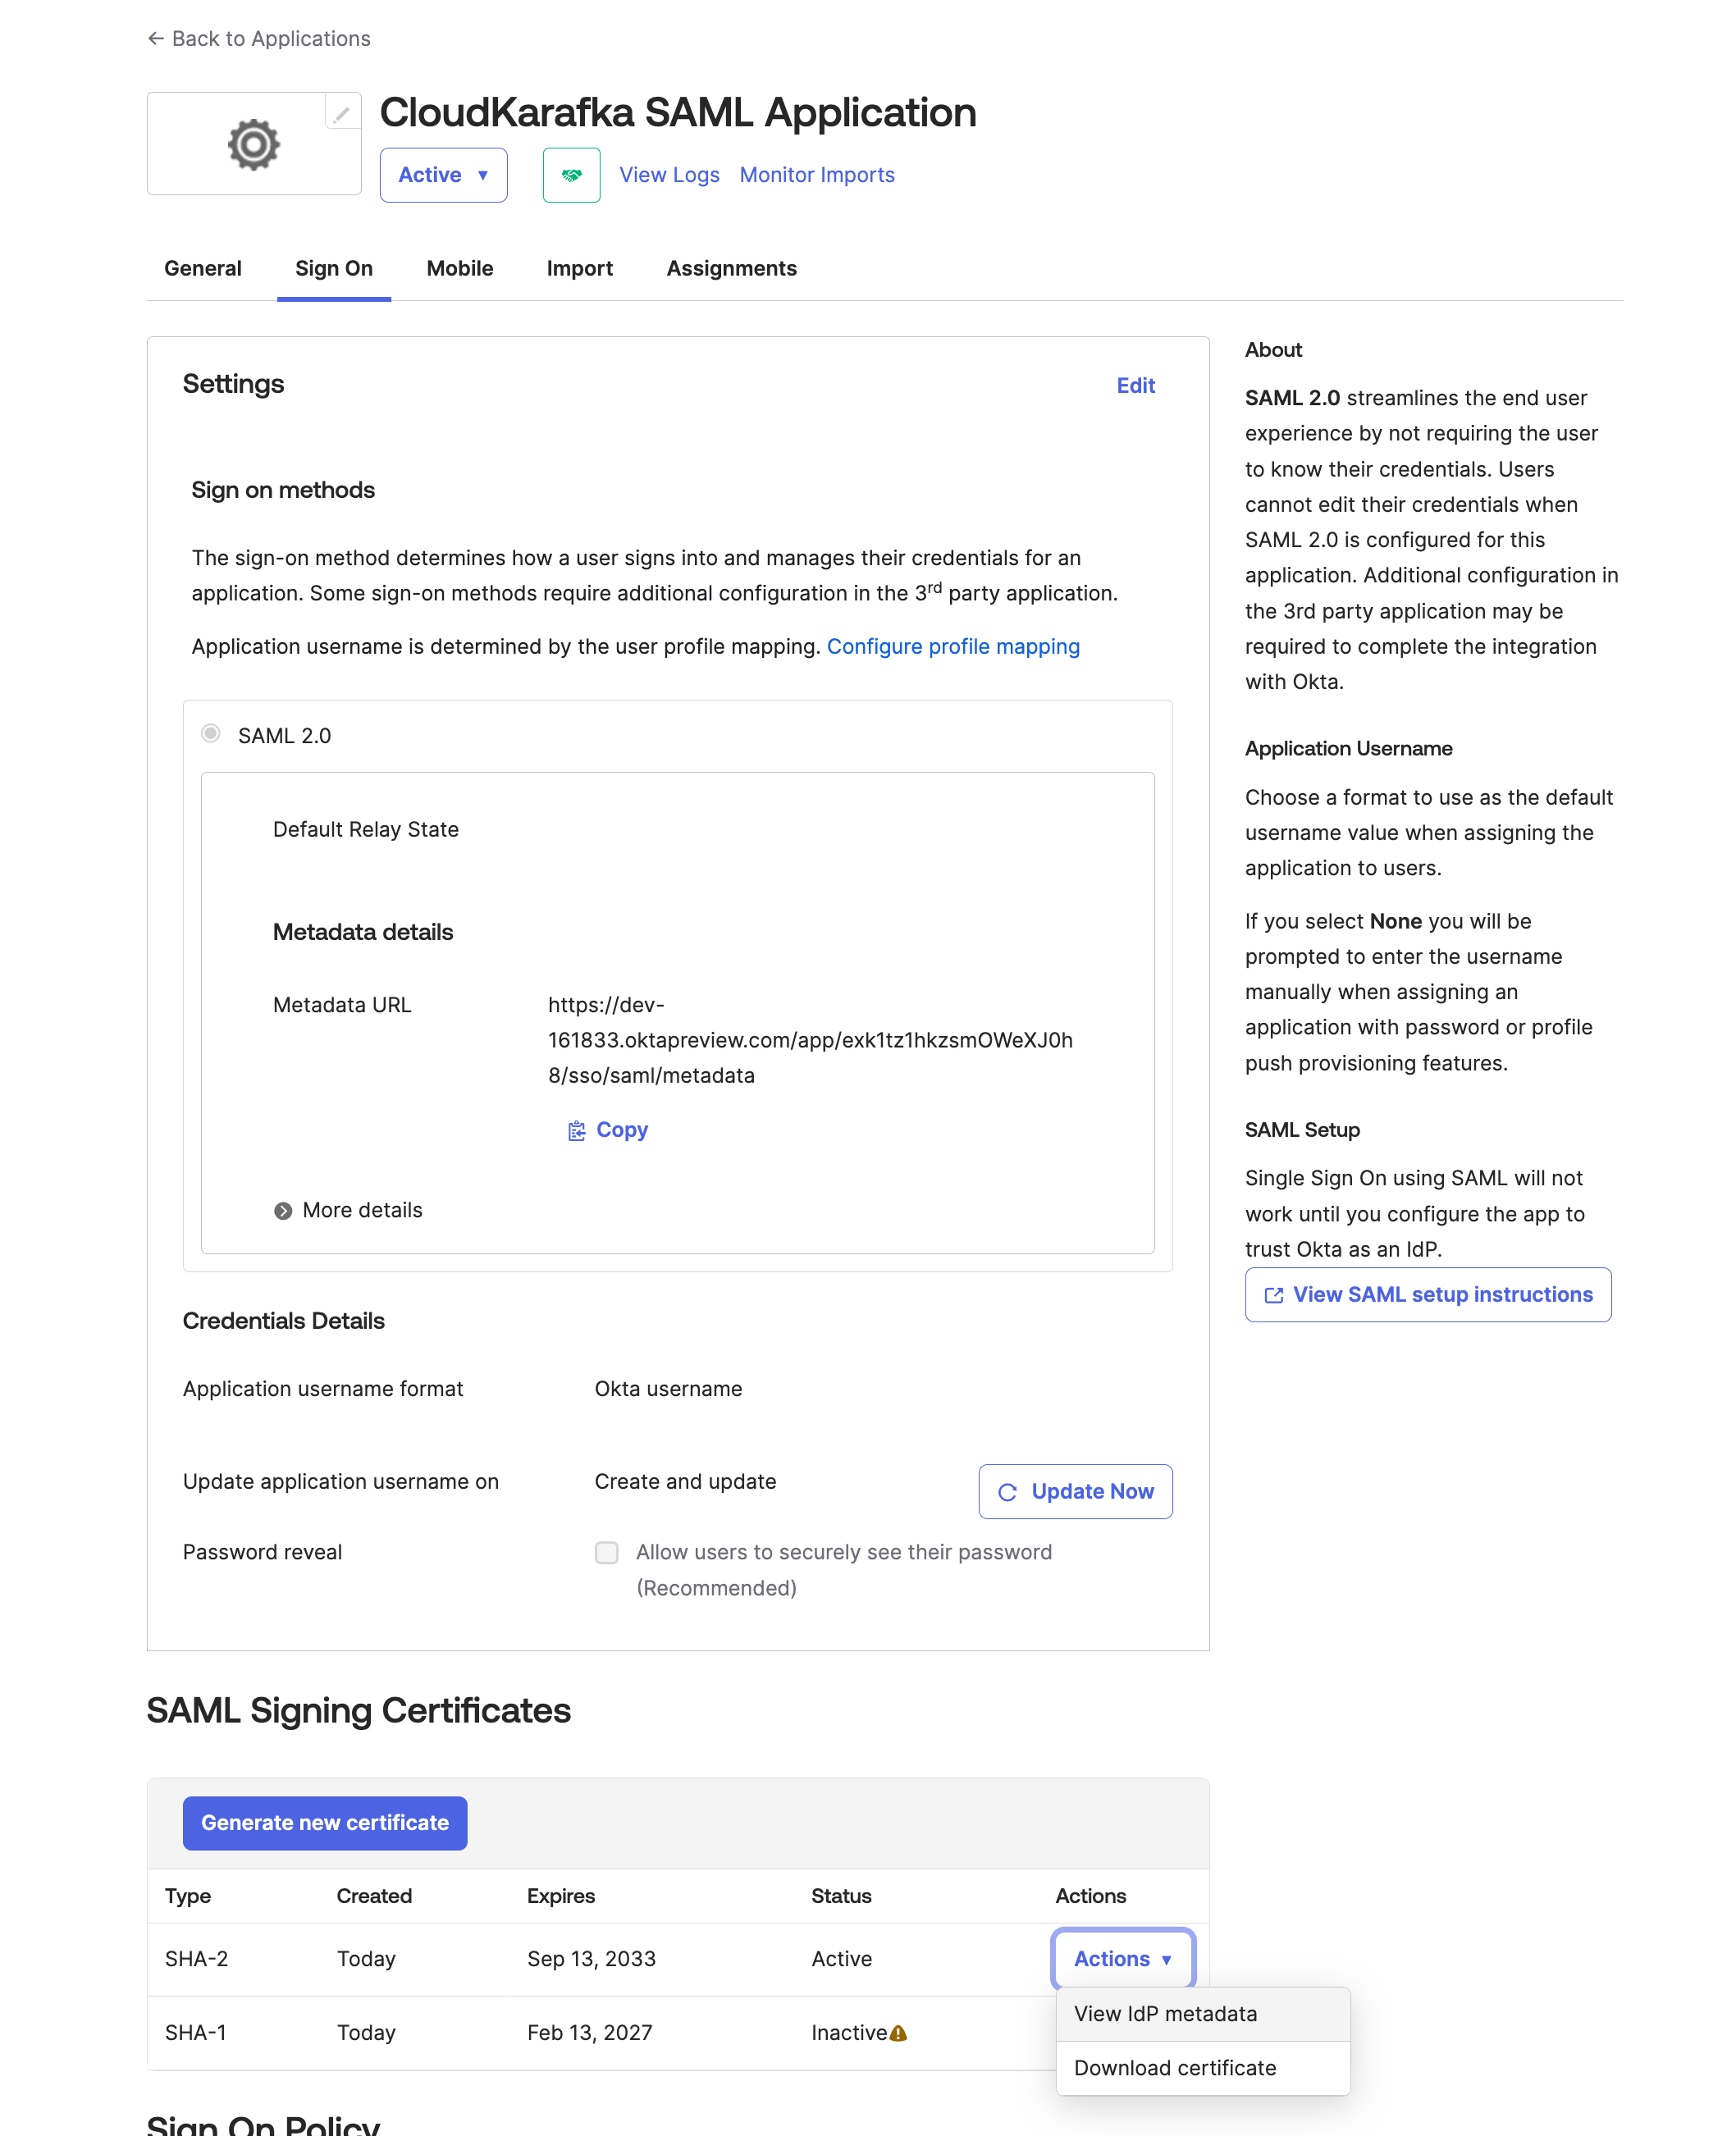
-
Click on View IDP Metadata. In the new browser tab that opens, right-click on the page, and choose Save As or Save Page As (depending on the browser). In Chrome and Edge after clicking on Save As, the file is downloaded as a XML file. In Firefox, choose Save Page As and Save as type select the "All files" option.
-
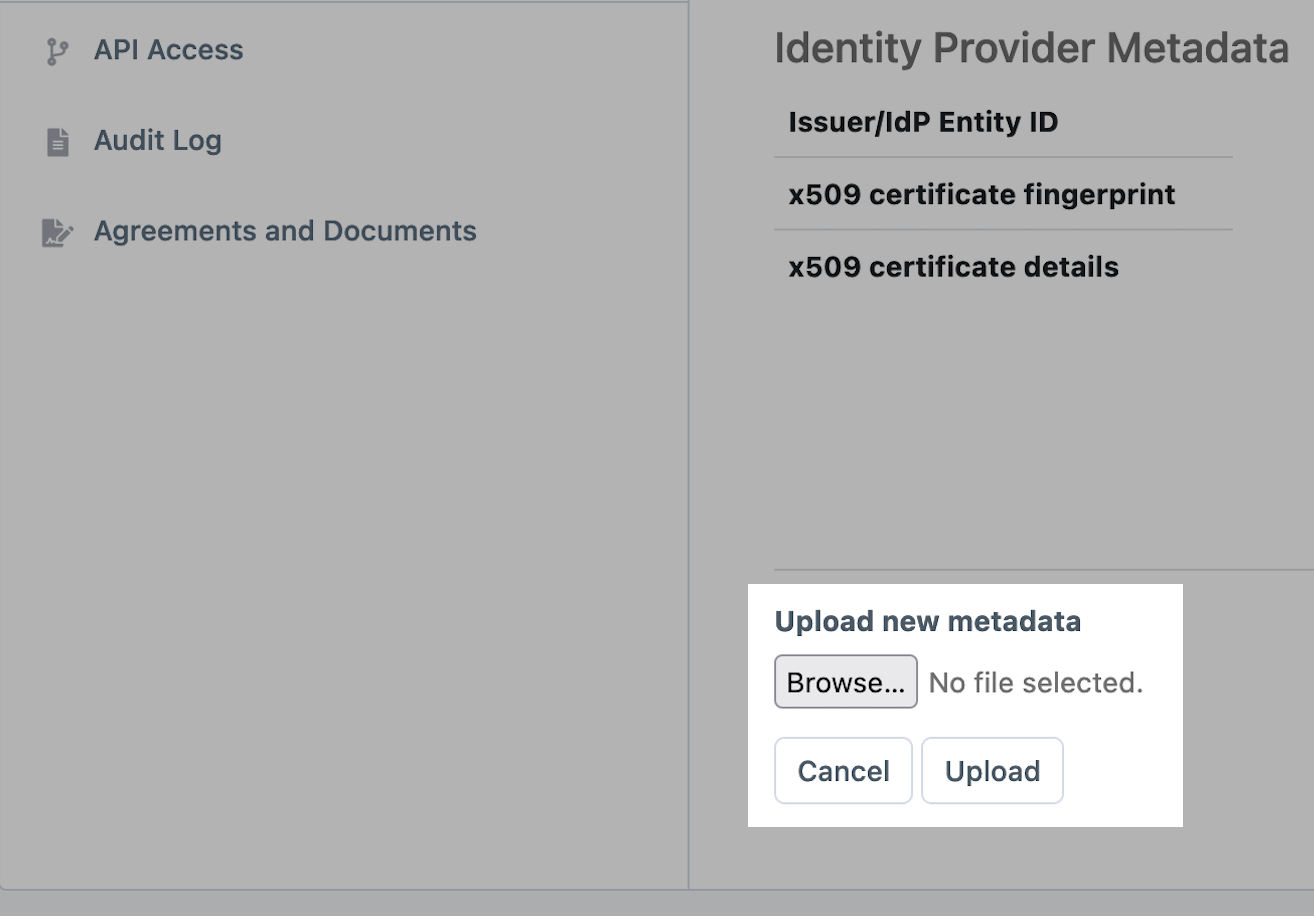
Go to https://customer.cloudkarafka.com/team/saml and click “Choose File” and pick the newly created xml file and then click Upload to upload this
-
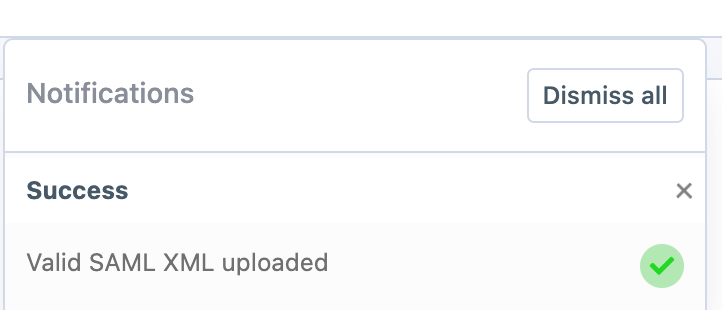
If successful a notification will appear in the top corner of the screen and the meta data should be visible under Identity Provider Metadata section
-
-
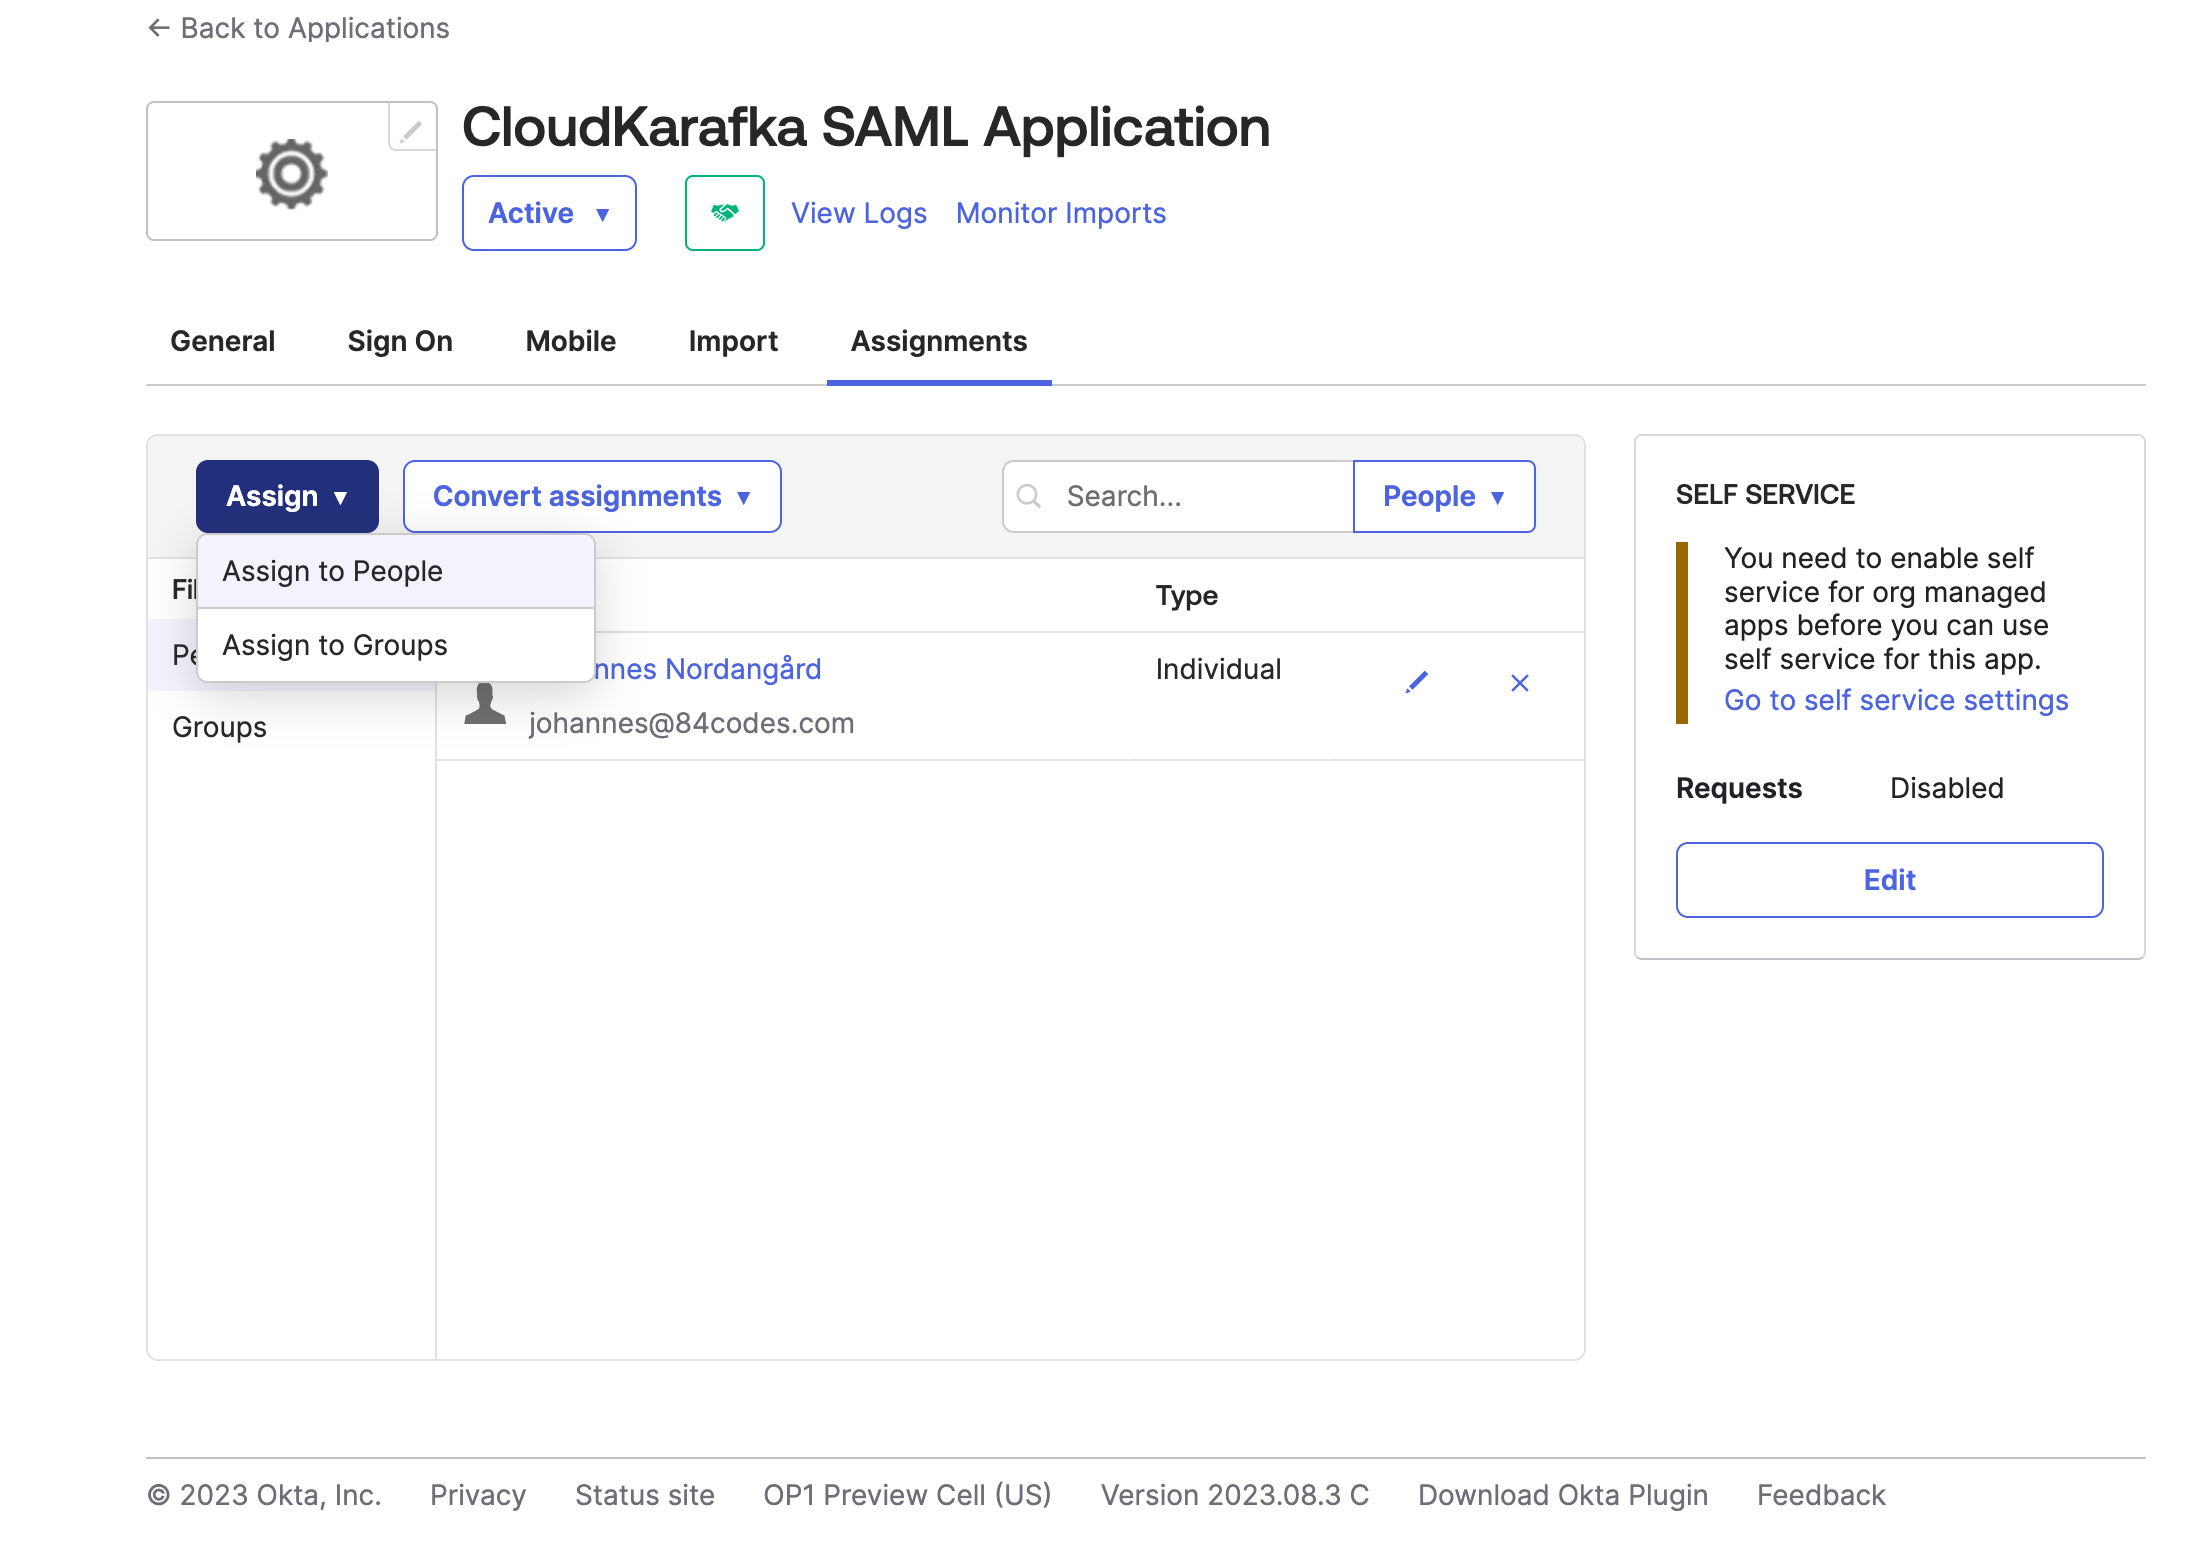
To Assign users in Okta to your new application, open the application and click the Assignment tab. From here click Assign and Assign to people to pick users that should have access to CloudKarafka thru SAML.
-
If you wish to assign the users CloudKarafka roles or specific tags in OKTA and have done the setup in step 8, do the following to define your CloudKarafka Team roles in Okta:
-
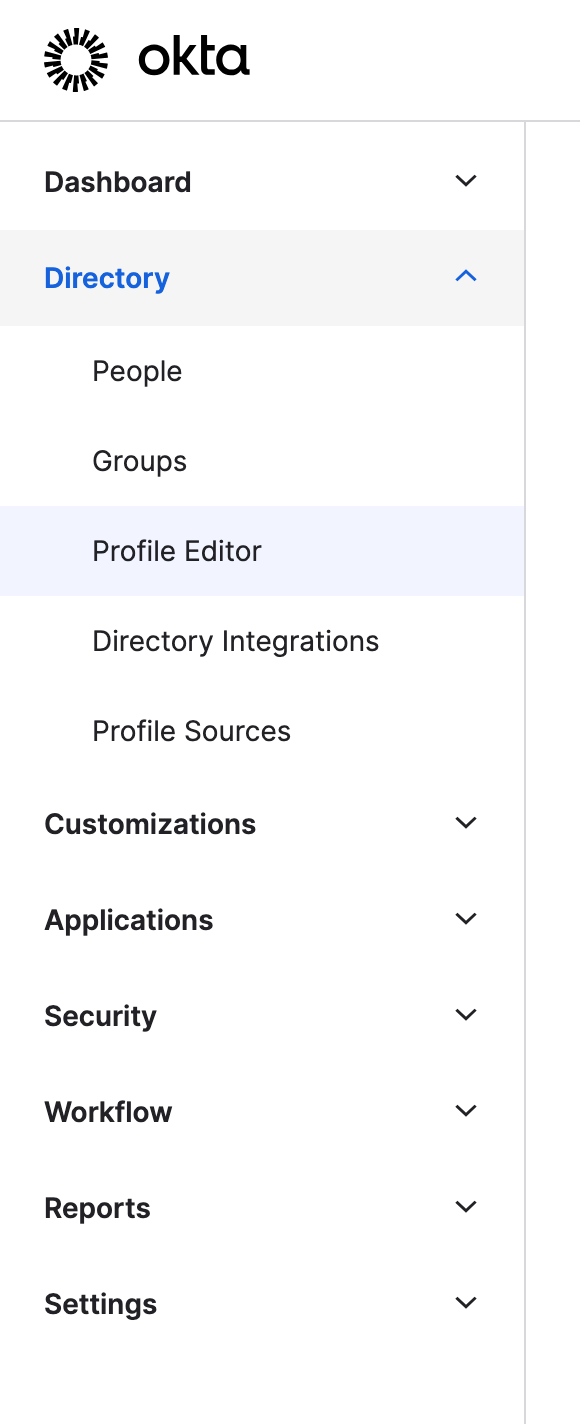
Go to Directory / Profile Editor And Click on your CloudKarafka application
-
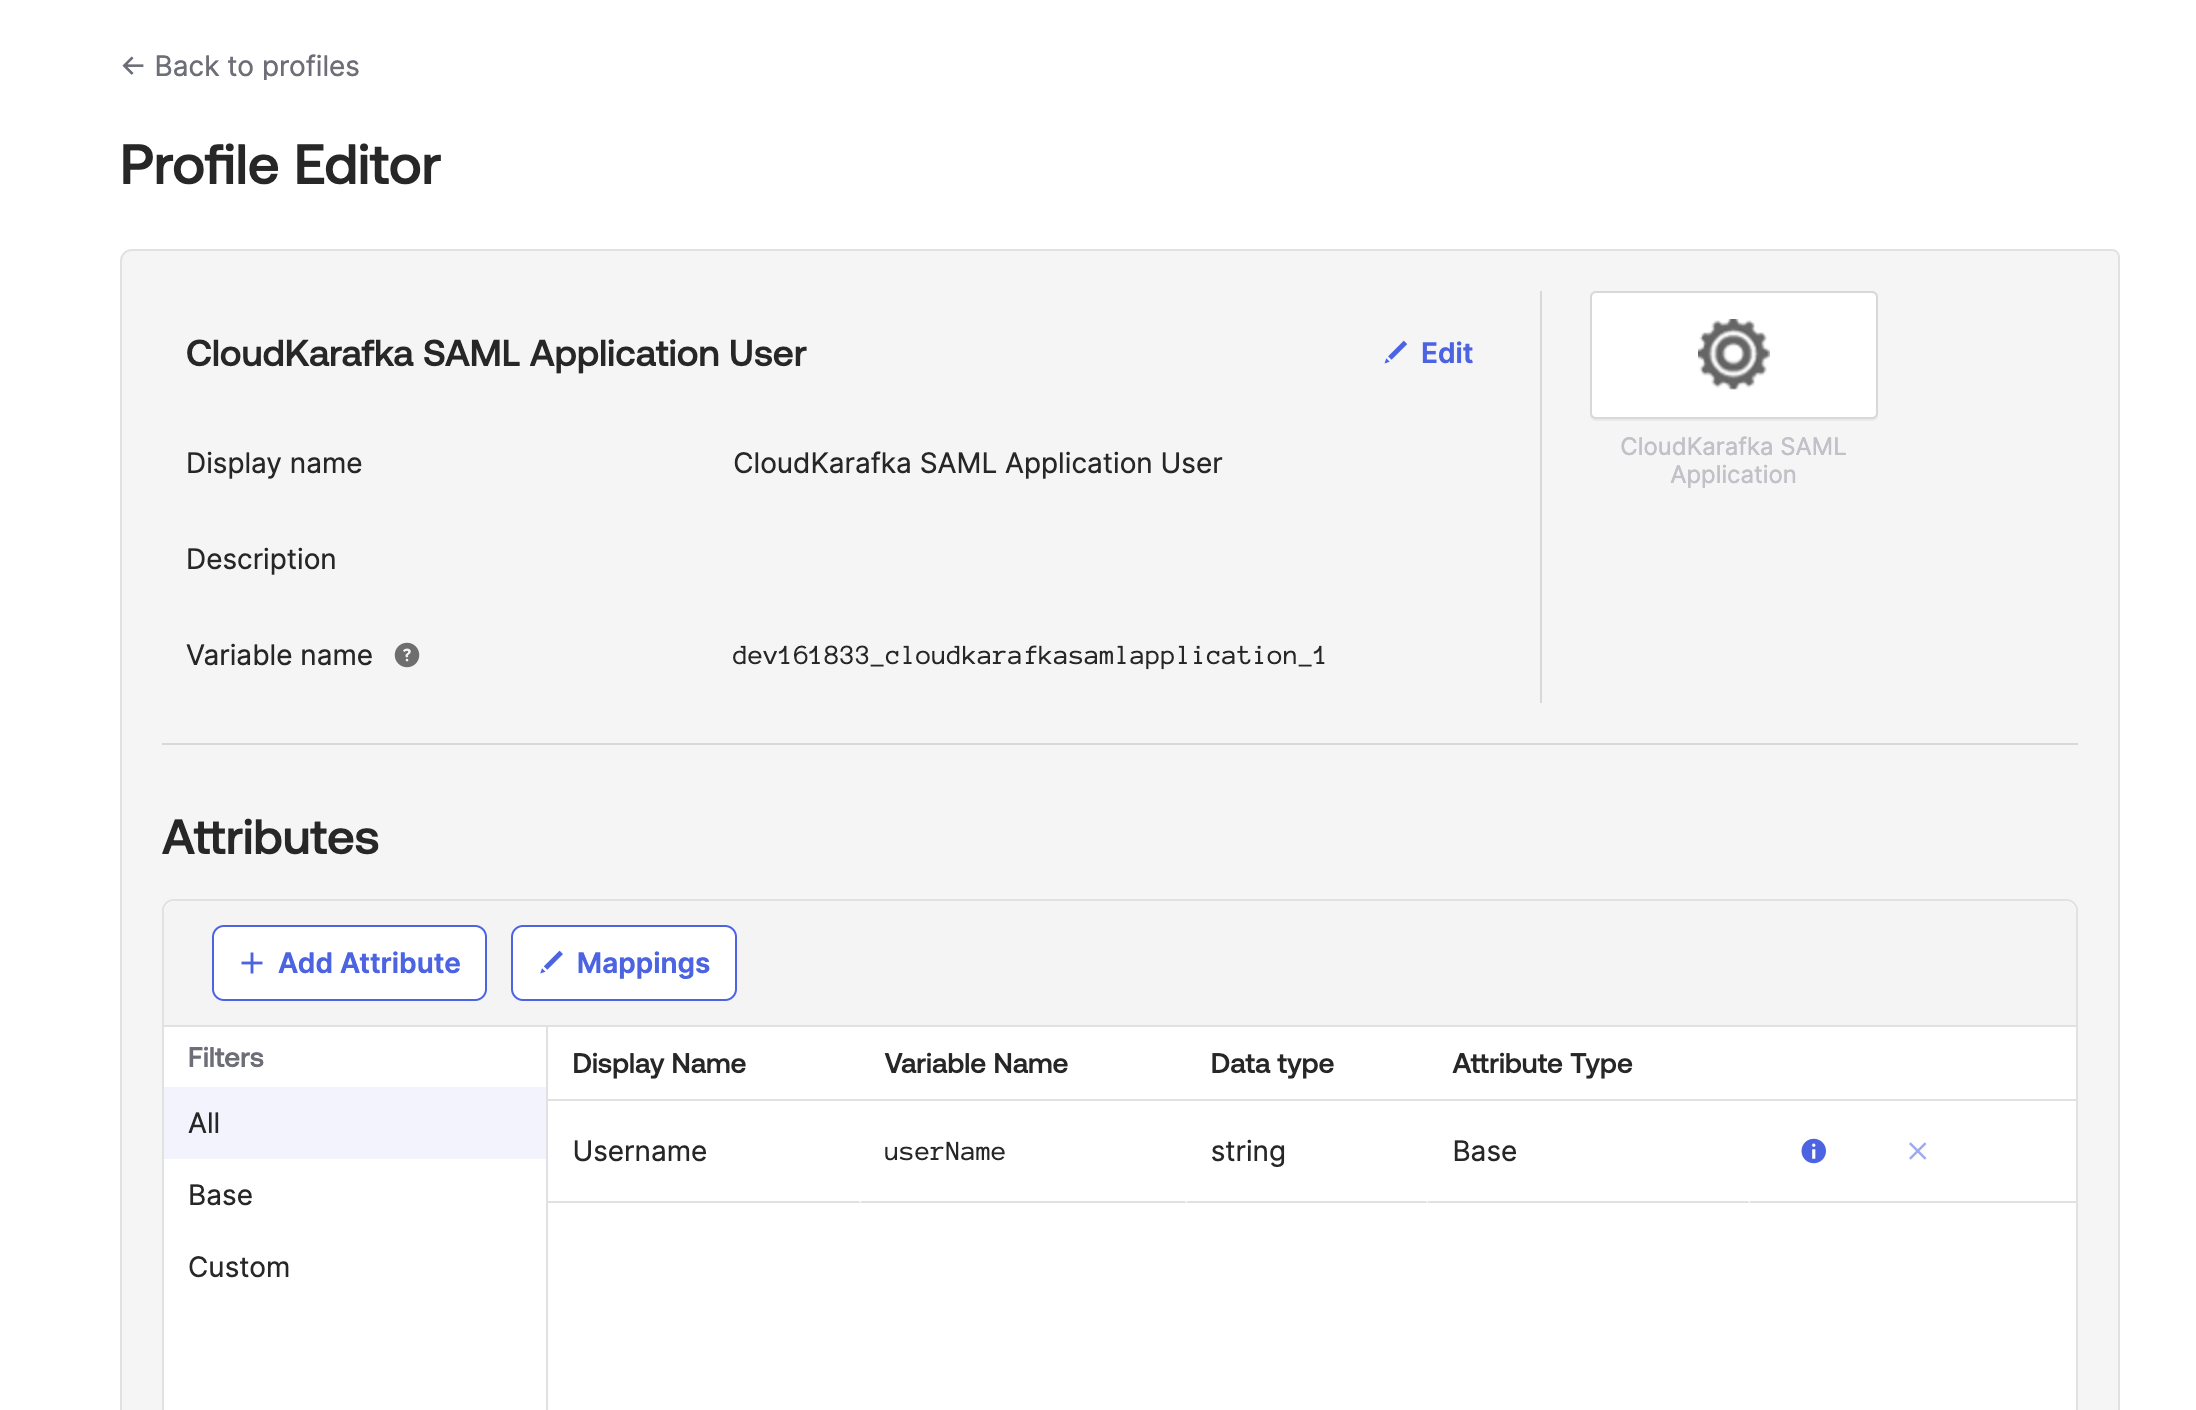
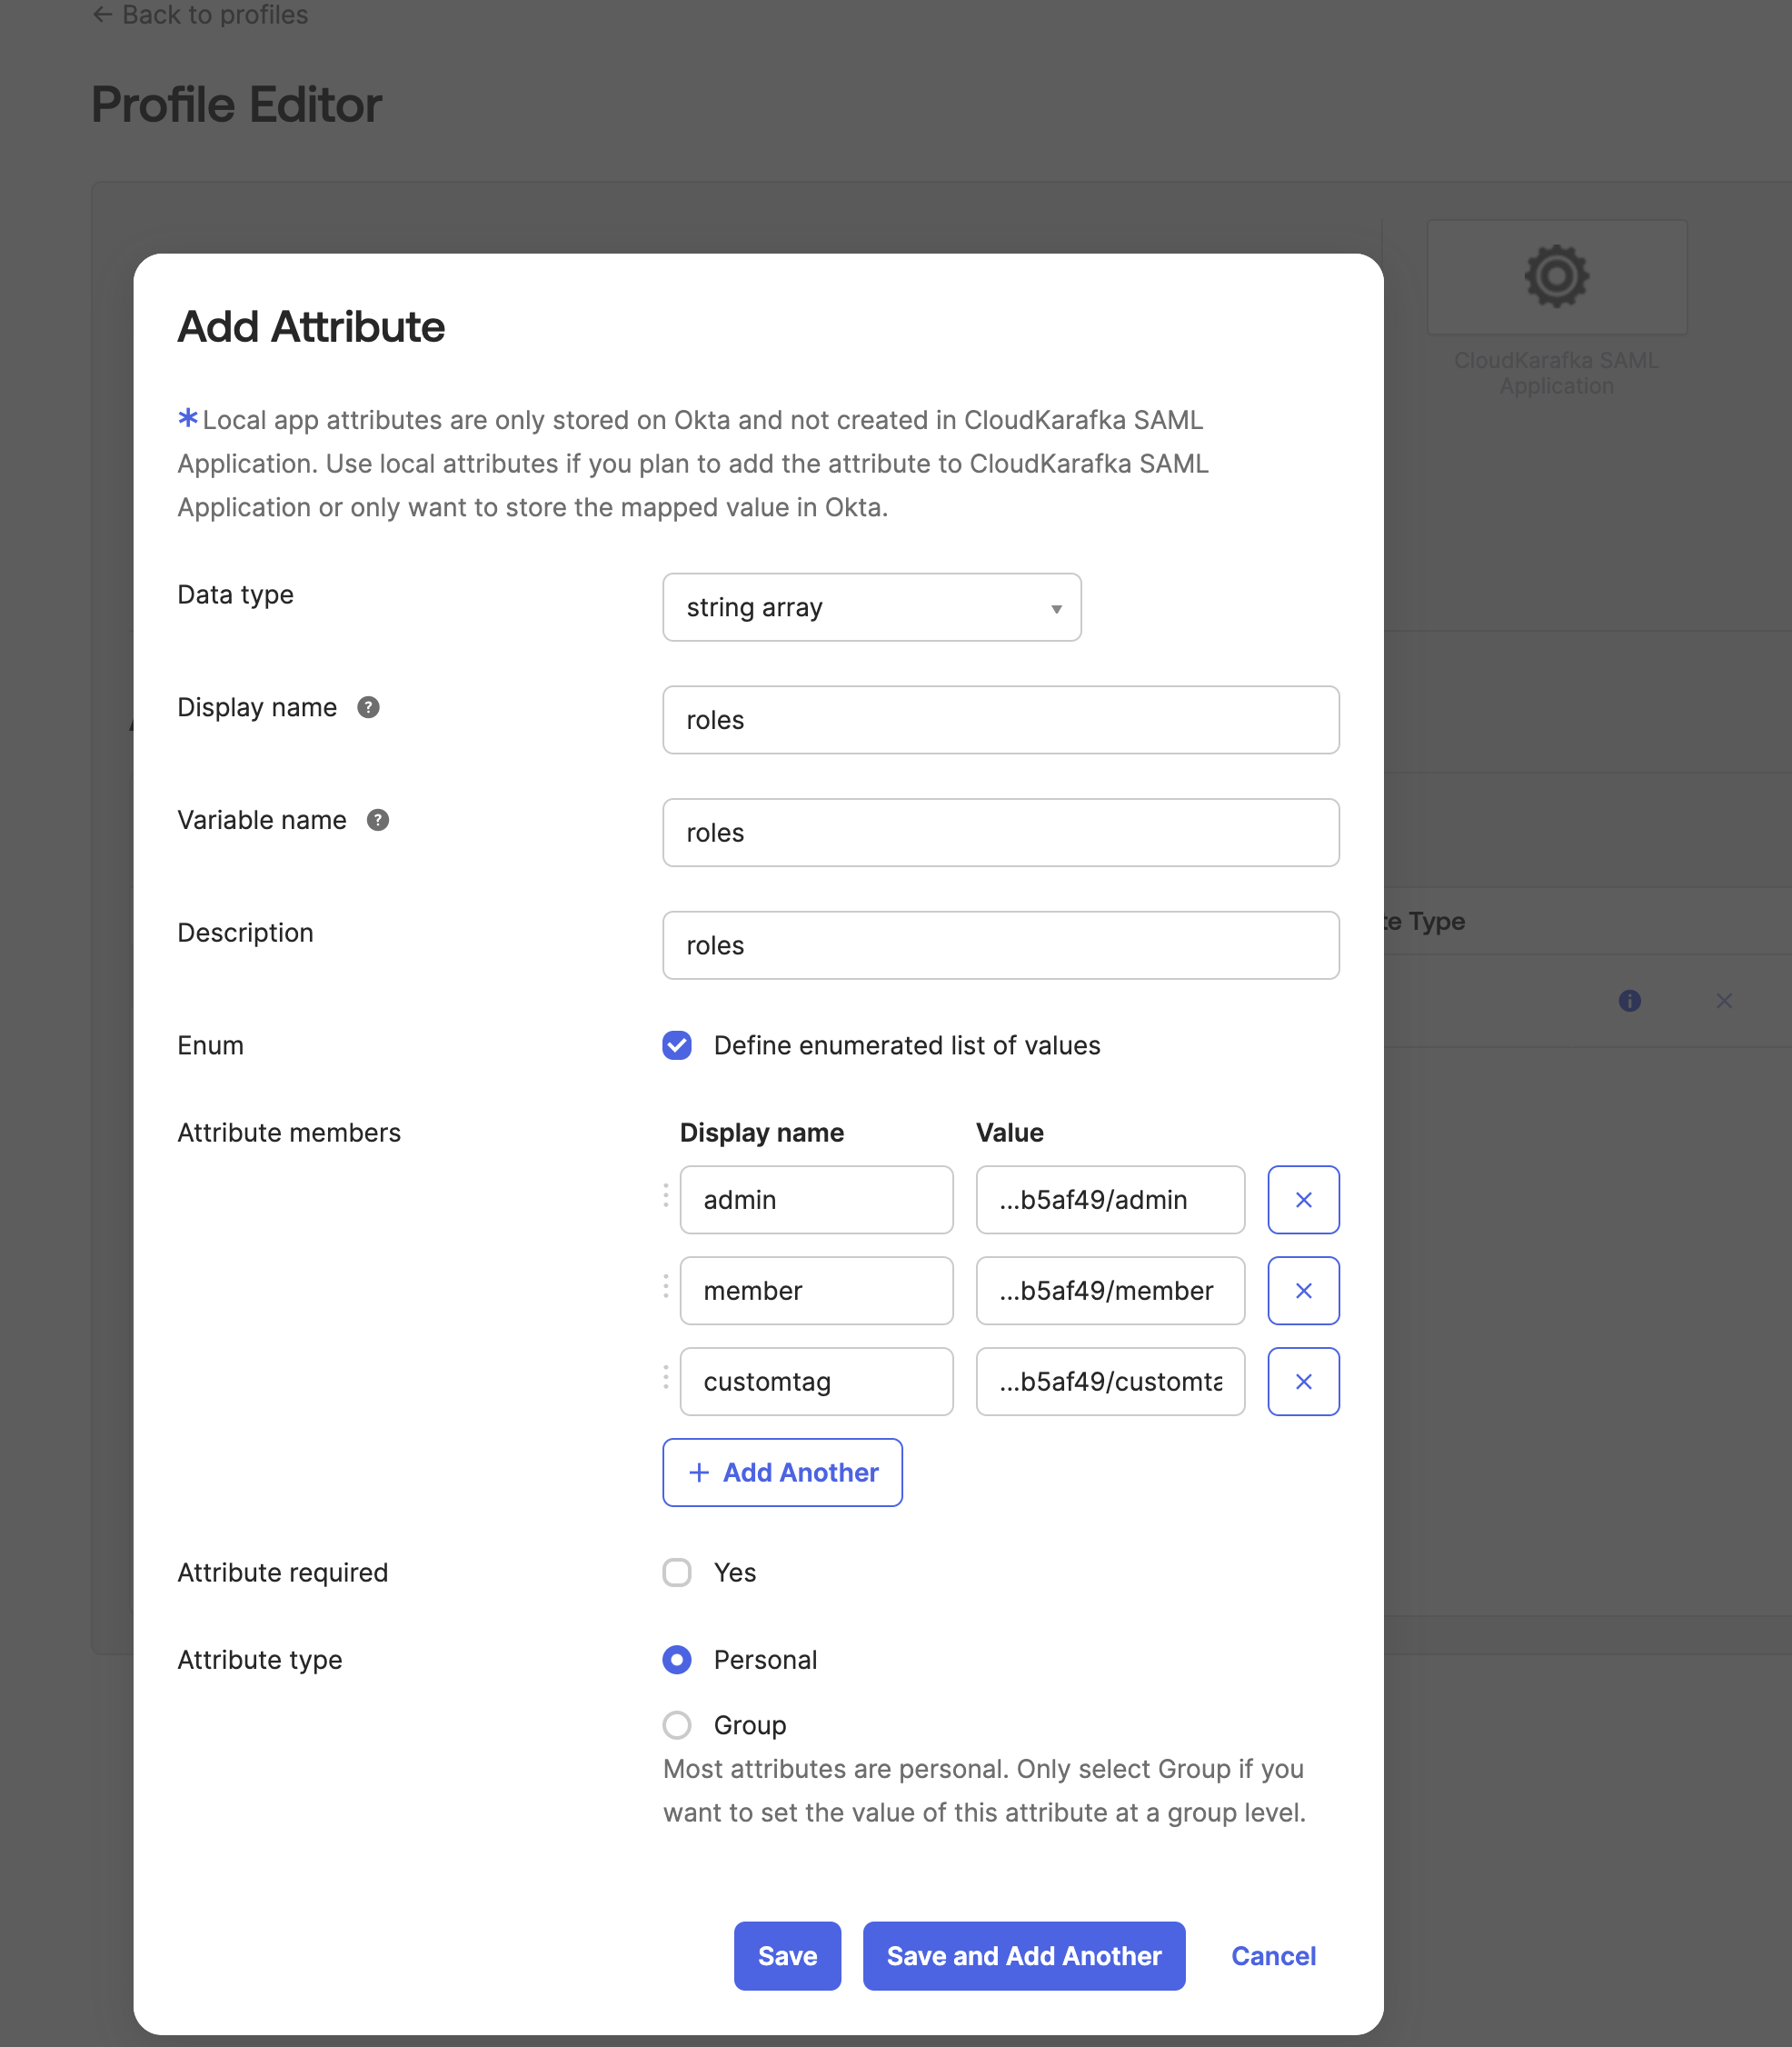
Click ADD Attribute
-
Enter the information as requested, making sure the variable name is roles, as it is used in the previous step (appname.roles). Under Attribute Members, enter the roles you wish to be able to choose from. The Value field contains the teams' unique code followed by / and the role name or tag. The exact values to use are listed as examples in your CloudKarafka settings at: https://customer.cloudkarafka.com/team/saml. Click Save once you are done.
-
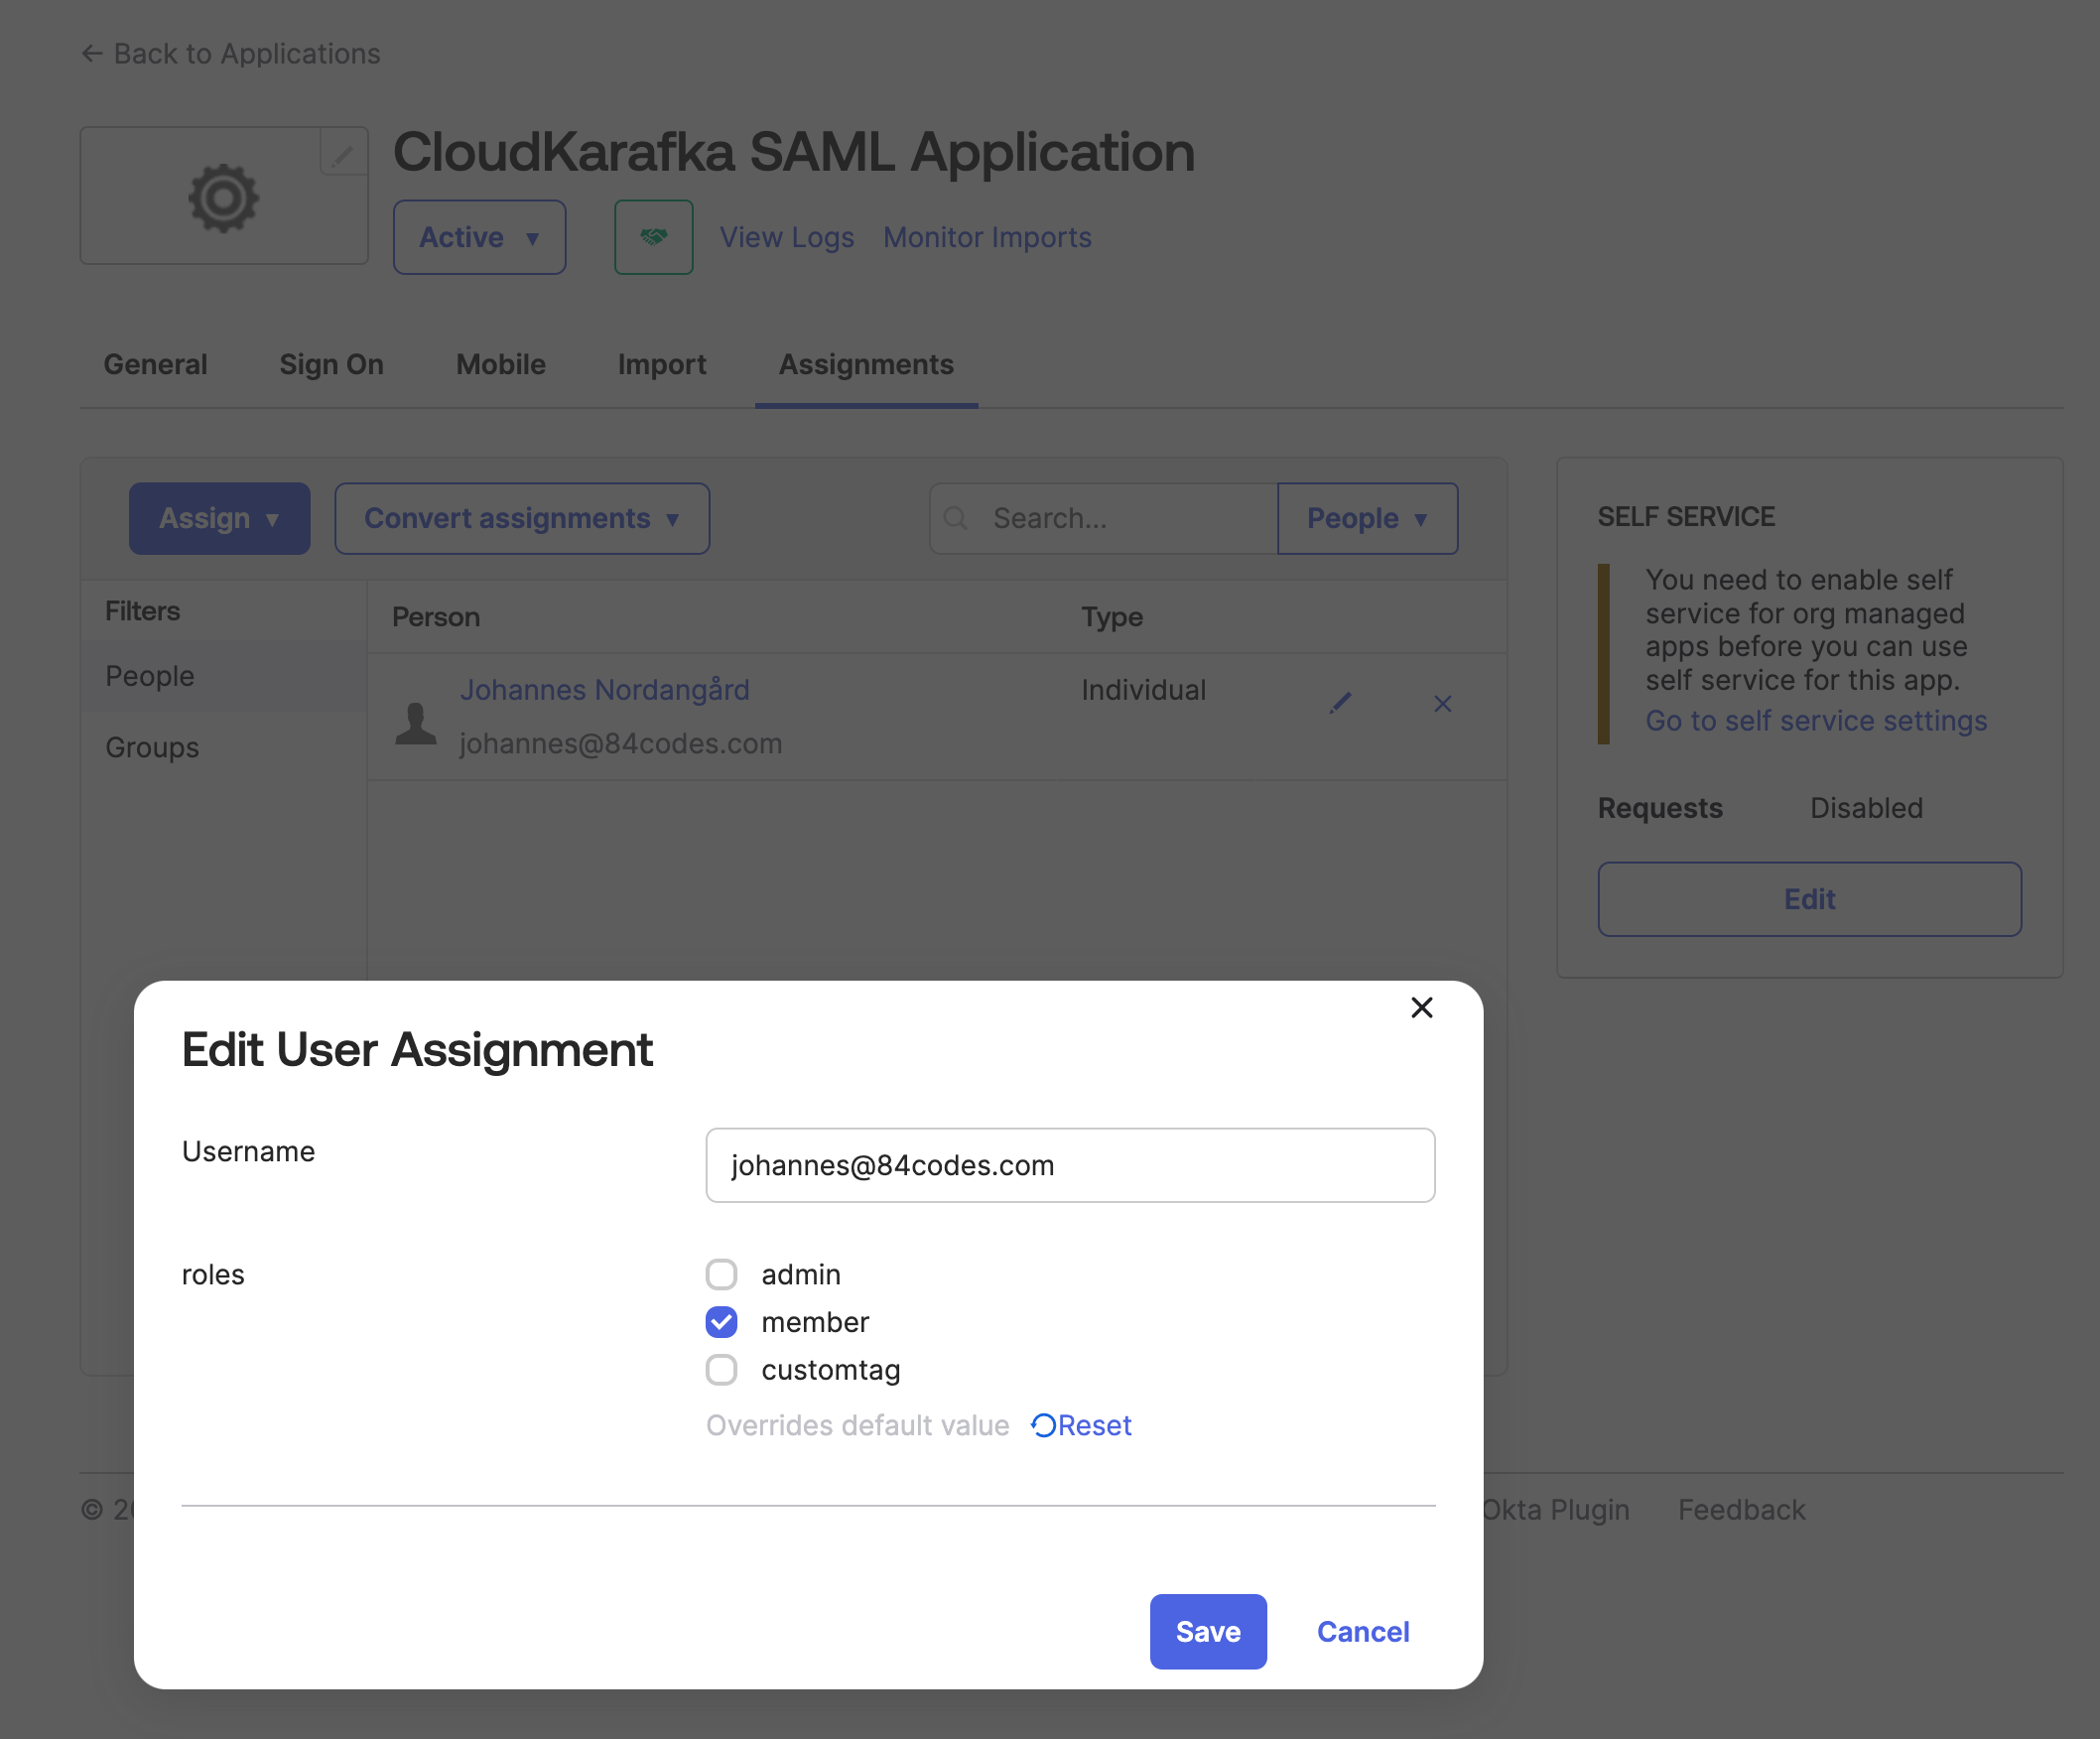
To assign the roles to your members, open up the application again Applications -> Applications in the side menu and, click on your created app in the list. Go to the Assignment tab. Here you can use the edit (pen) button next to each user to assign a role to each one. Click Save once you are done.
-
Azure- SAML login on CloudKarafka
-
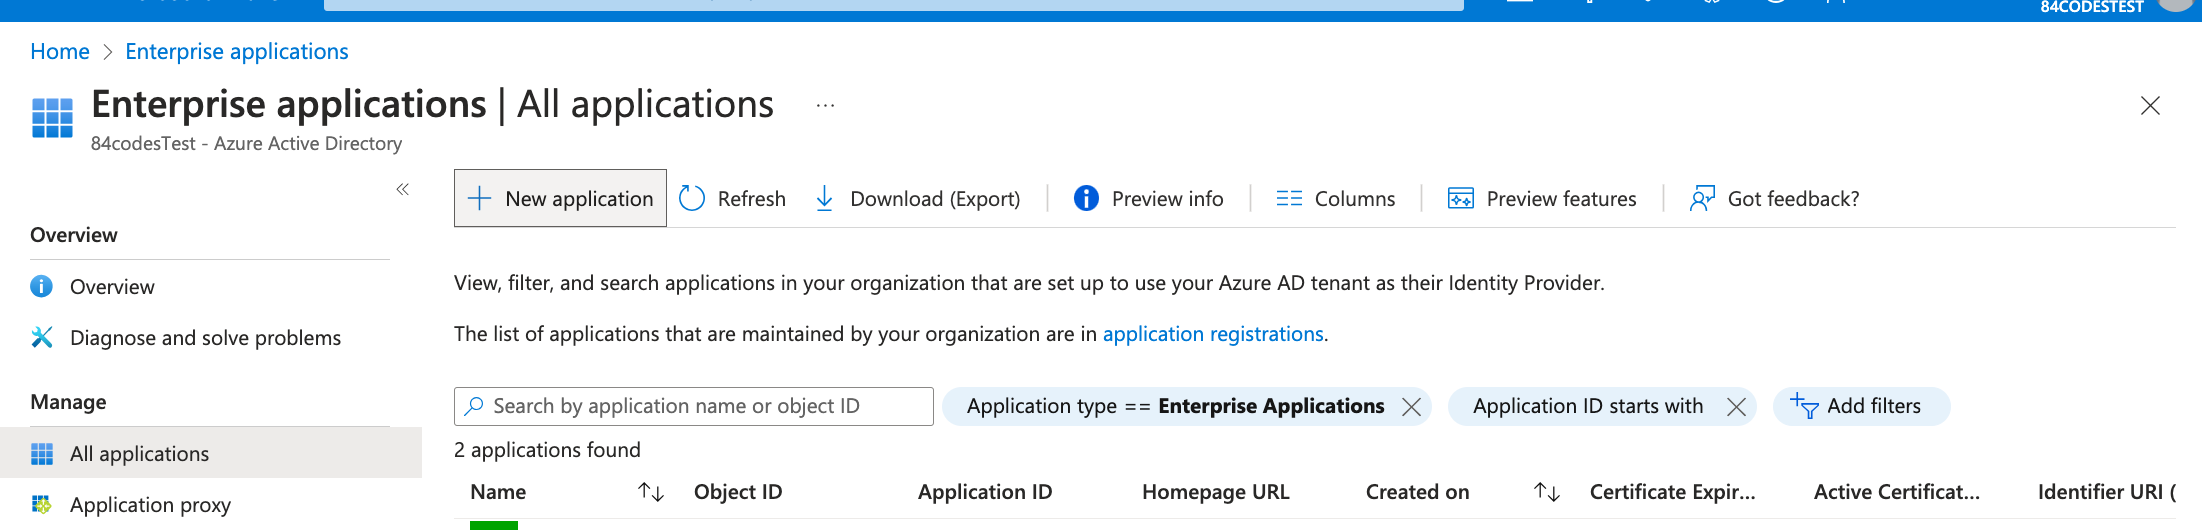
Go to https://portal.azure.com > Enterprise applications > New application
-
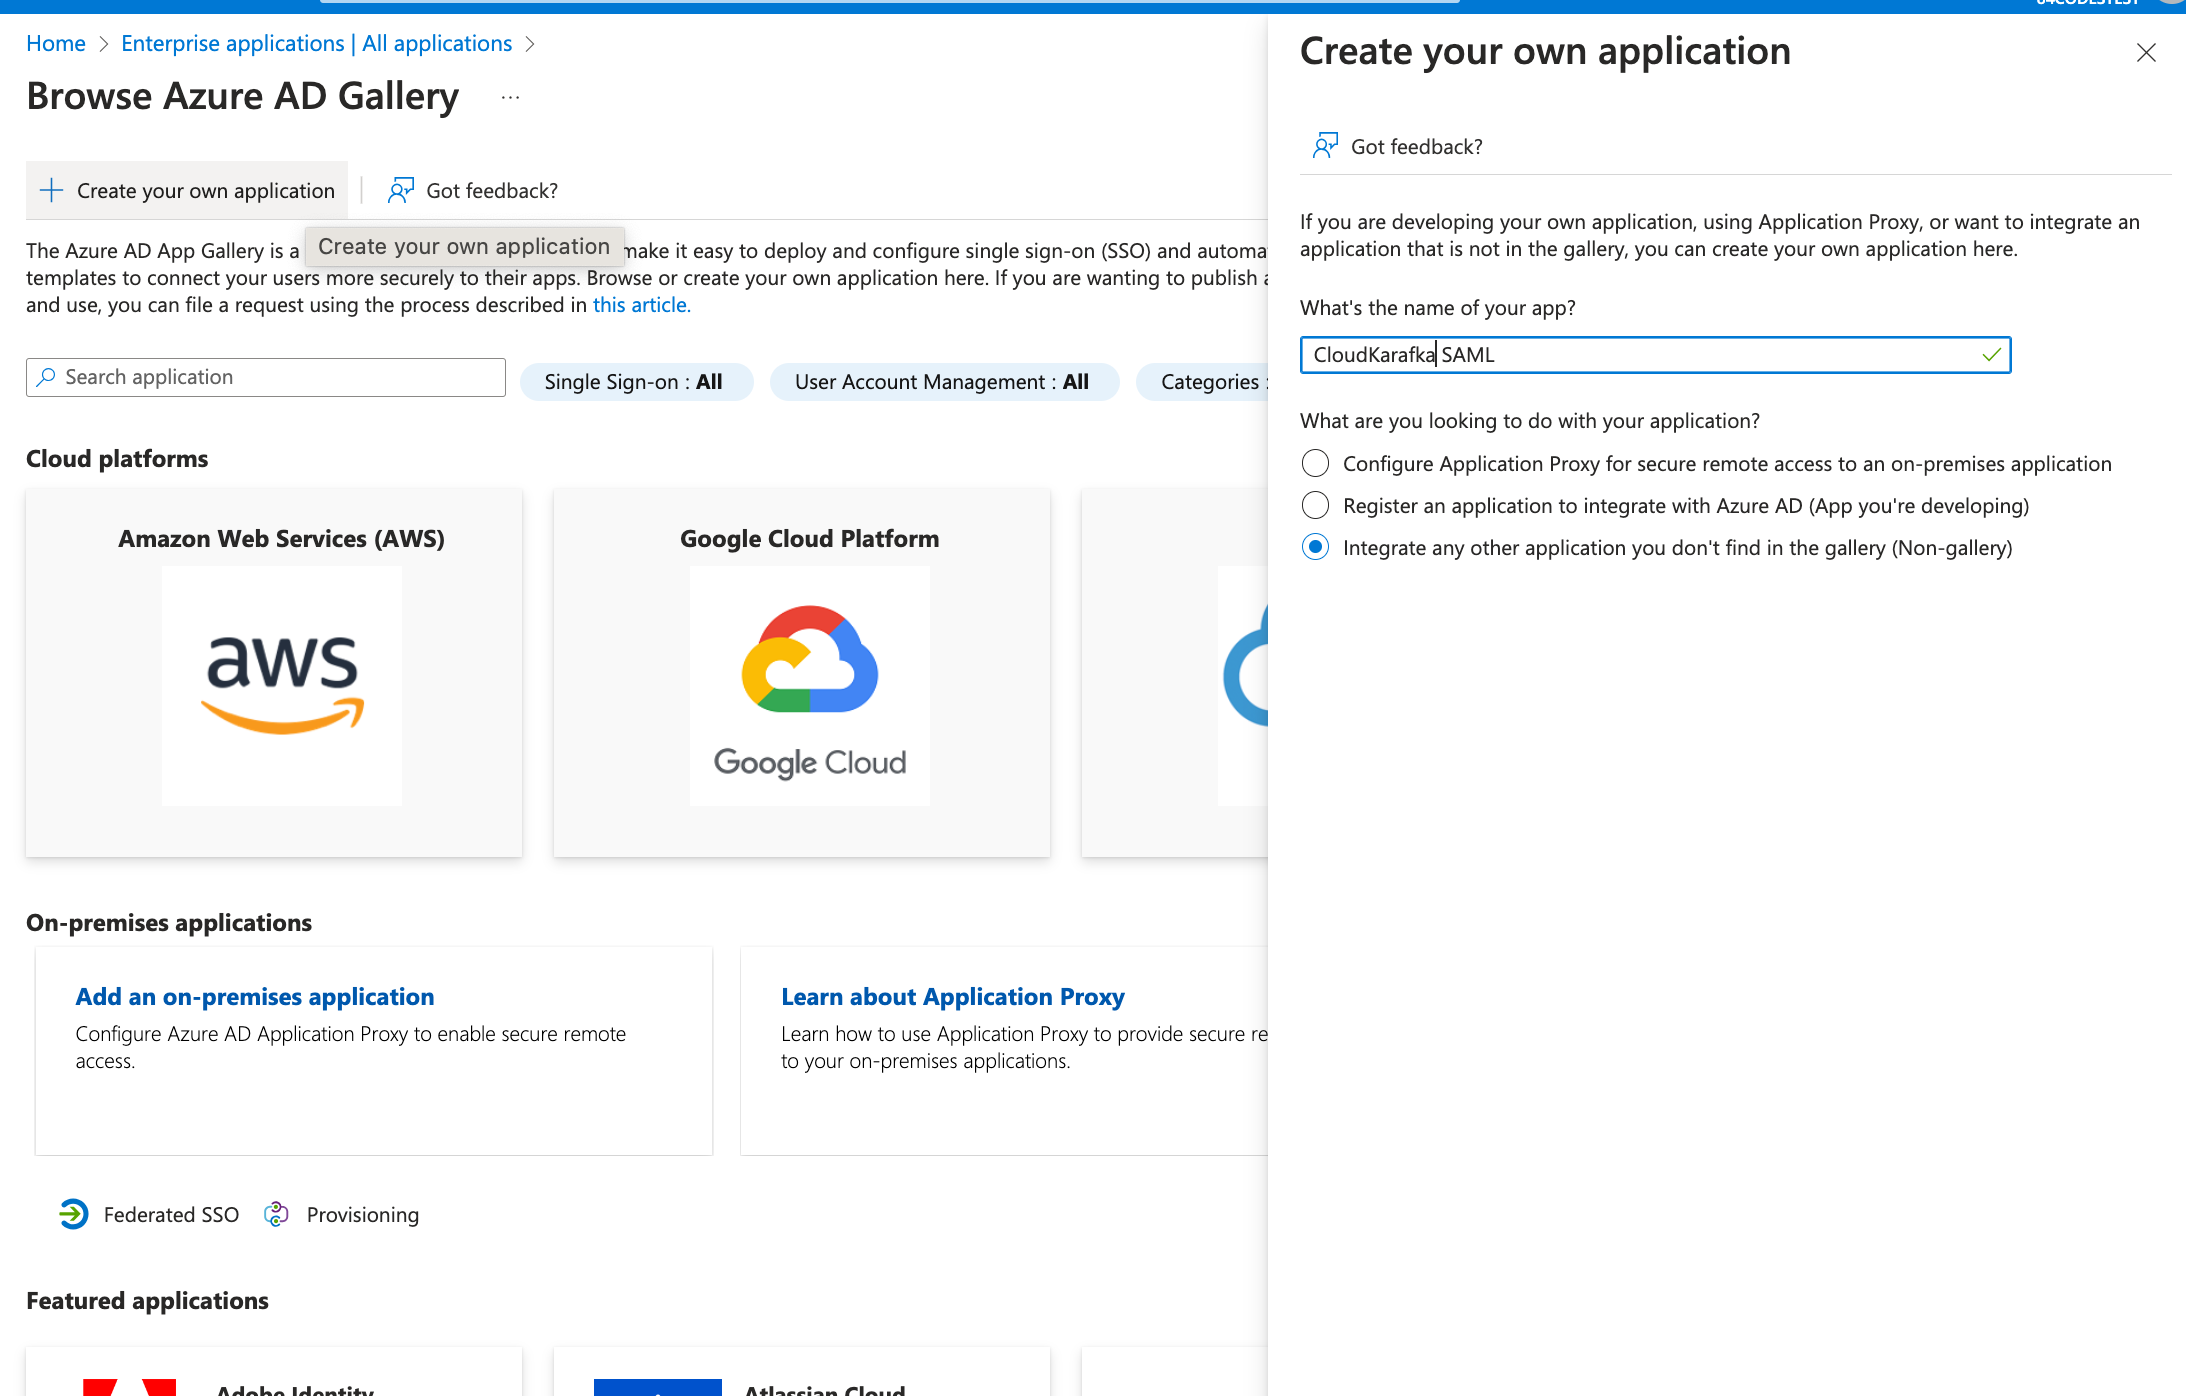
Click “+ Create your own Application” and enter a name for the Integration Application. Choose “Integrate any other application you don't find in the gallery (Non-gallery)” and click Create.
-
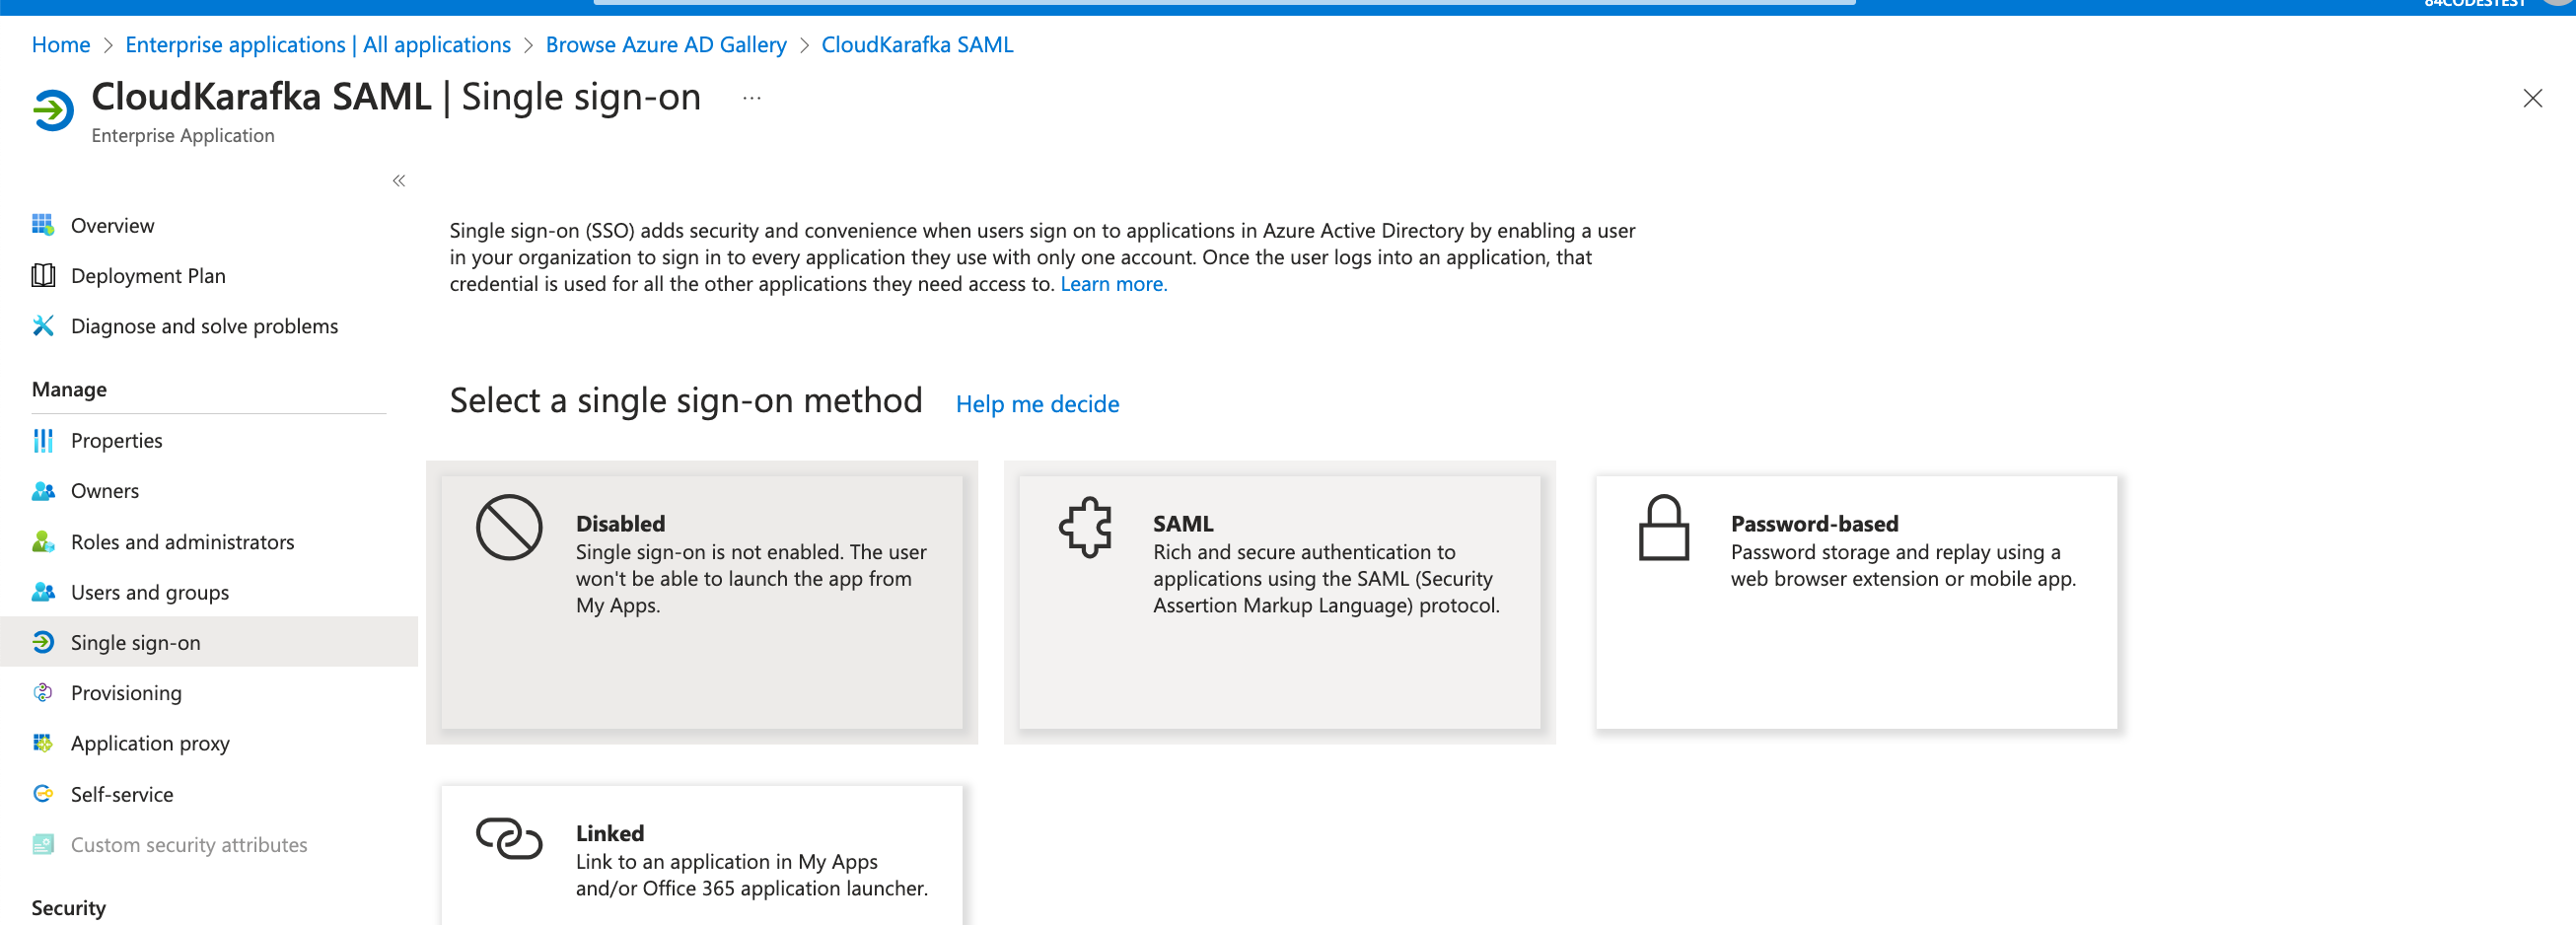
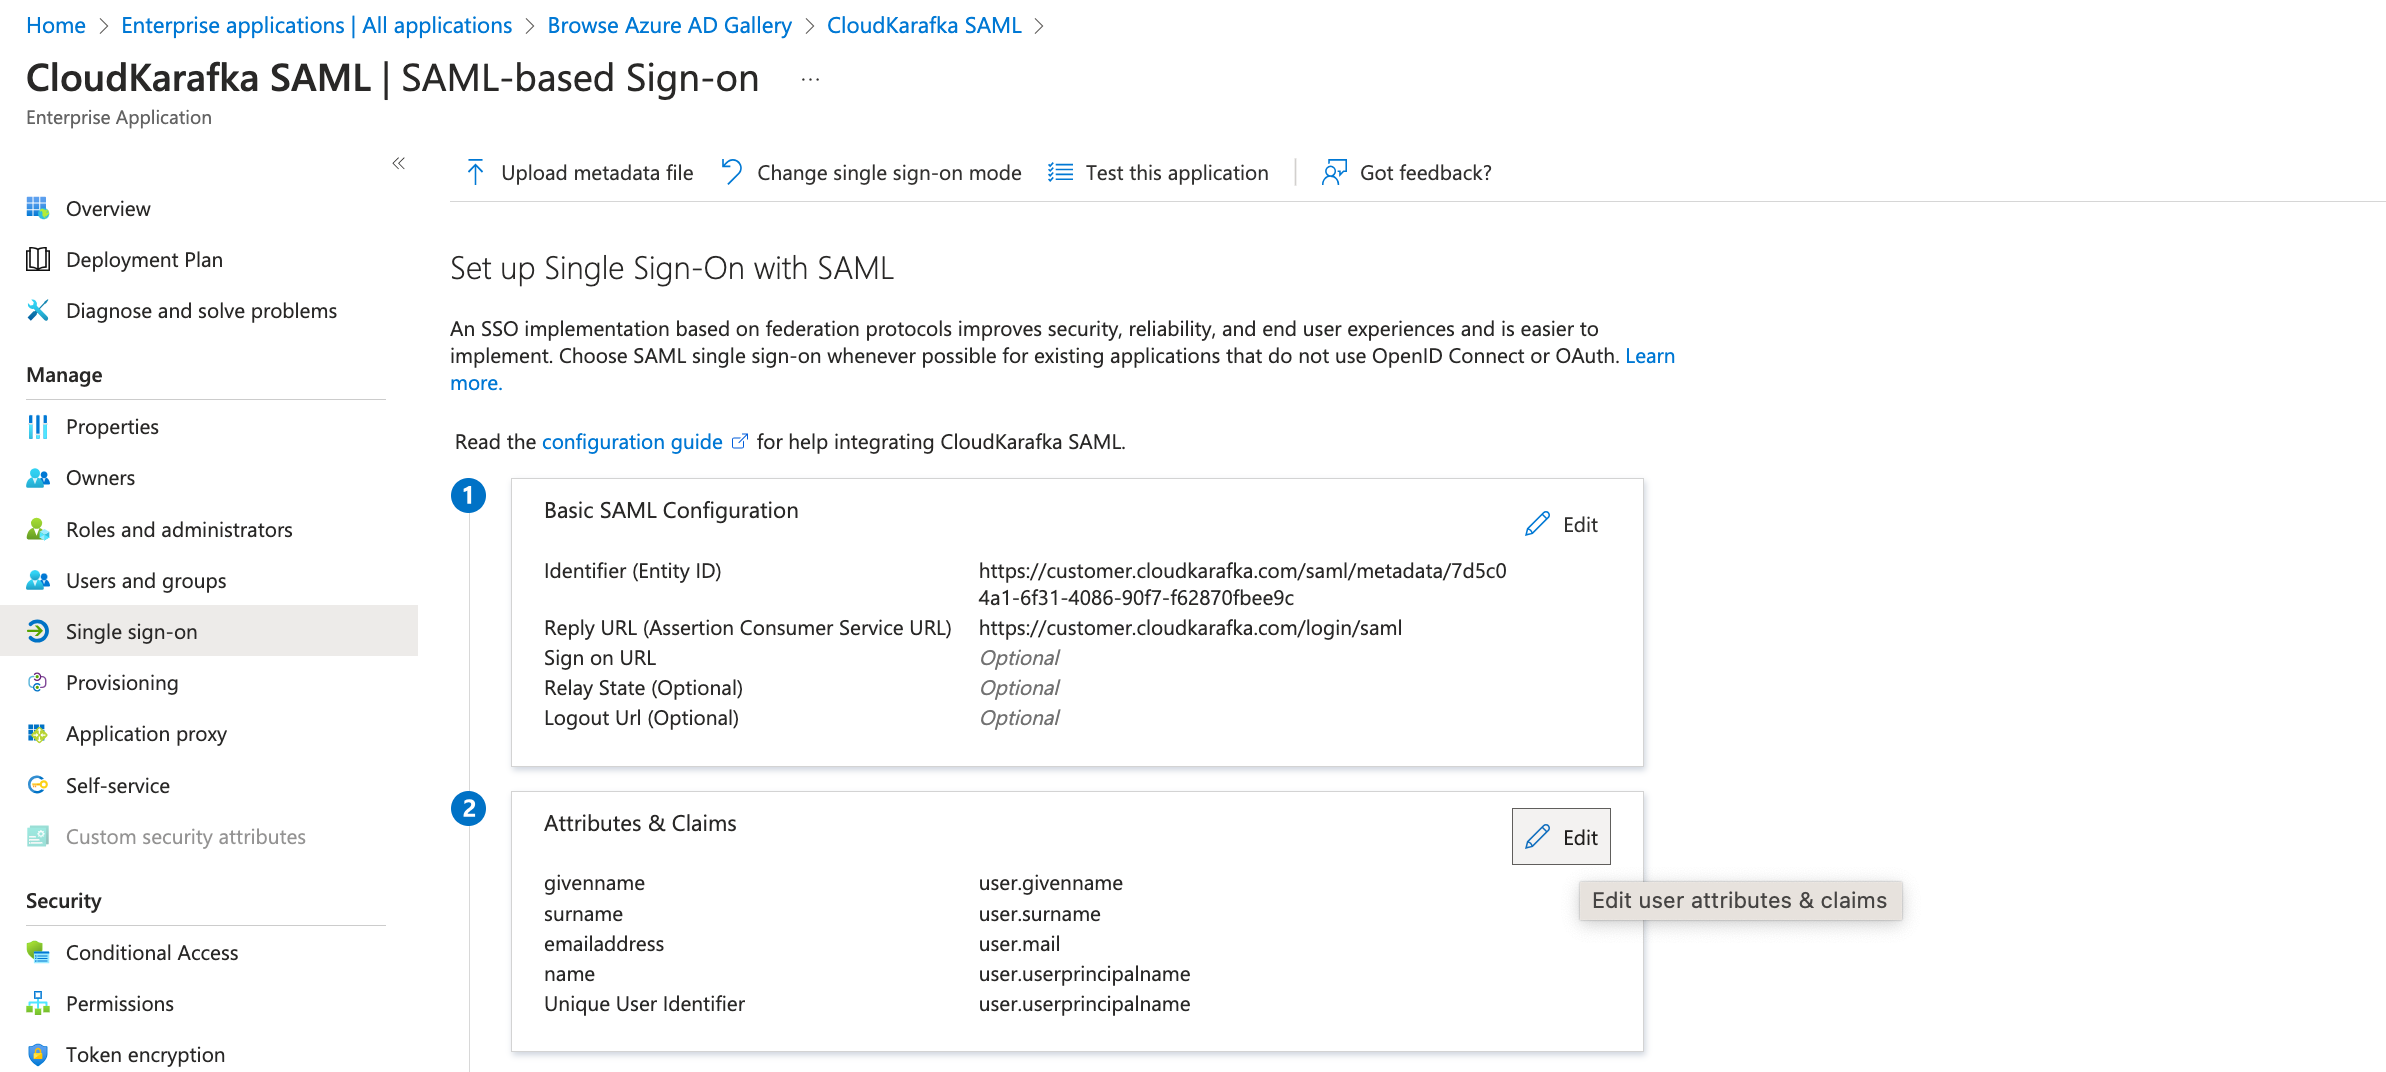
The app is now created but needs to be configured. In the view for the newly created application, open single sign-on from the side menu and select SAML.
-
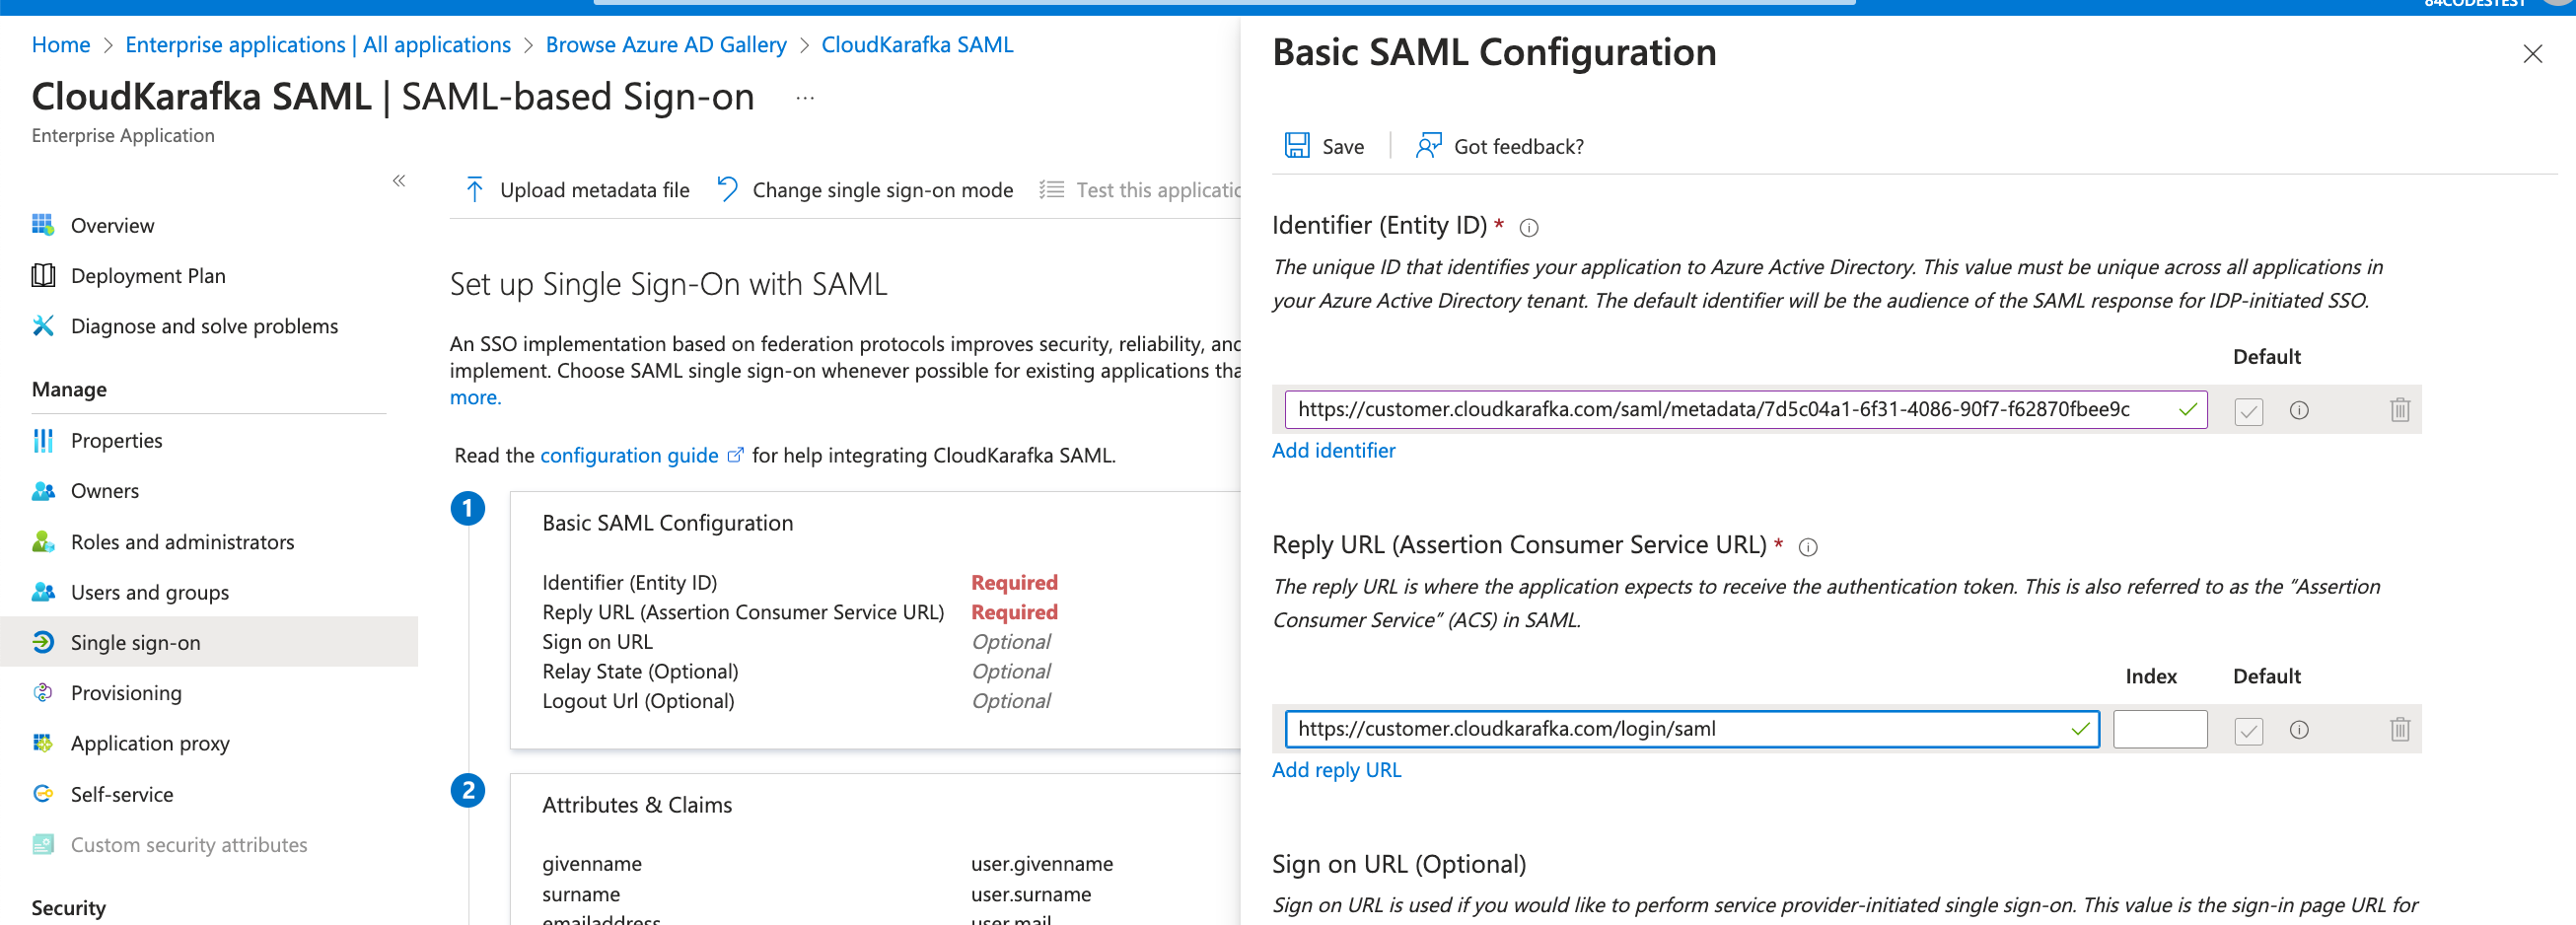
Click the edit pen for Basic SAML Configuration
-
Add Identifier (Entity ID) with the value you'll find at https://customer.cloudkarafka.com/team/saml named “SAML Audience URL/Audience URI/SP Entity ID/SAML Metadata”. Add Reply URL as https://customer.cloudkarafka.com/login/saml
NOTE: Leave the Sign on URL field BLANK. Click Save
-
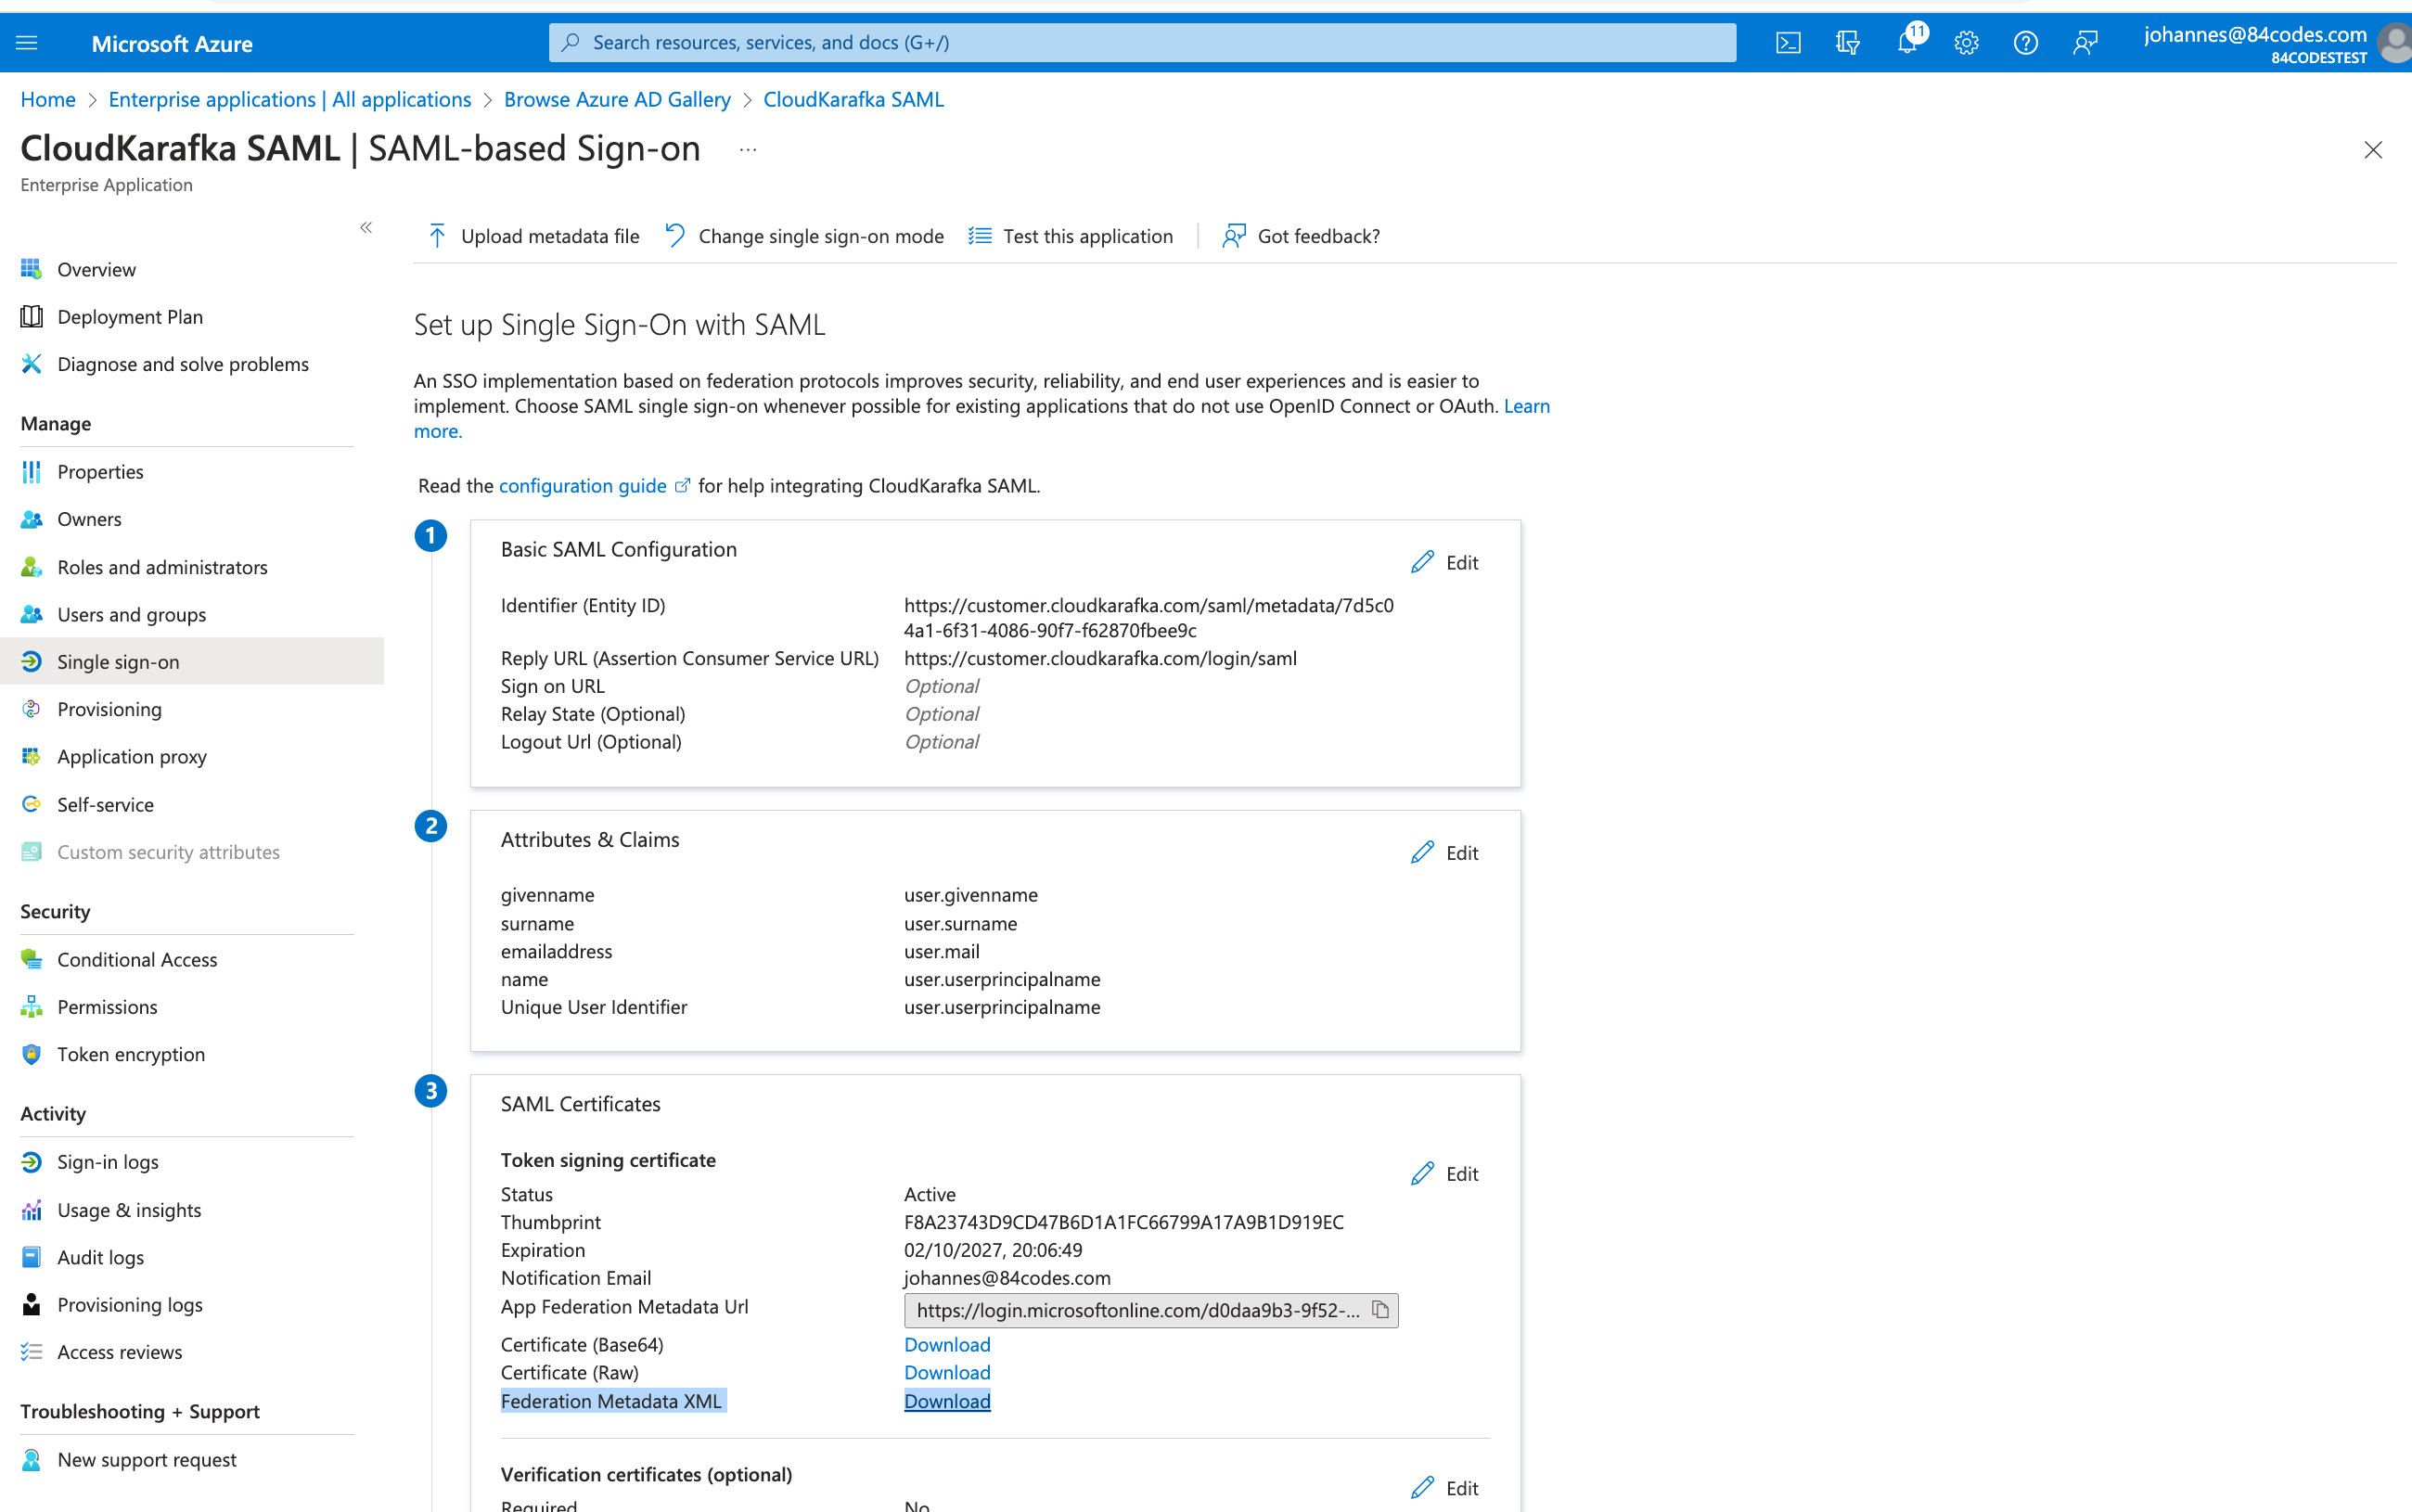
Download the Federation Metadata XML from the overview.
-
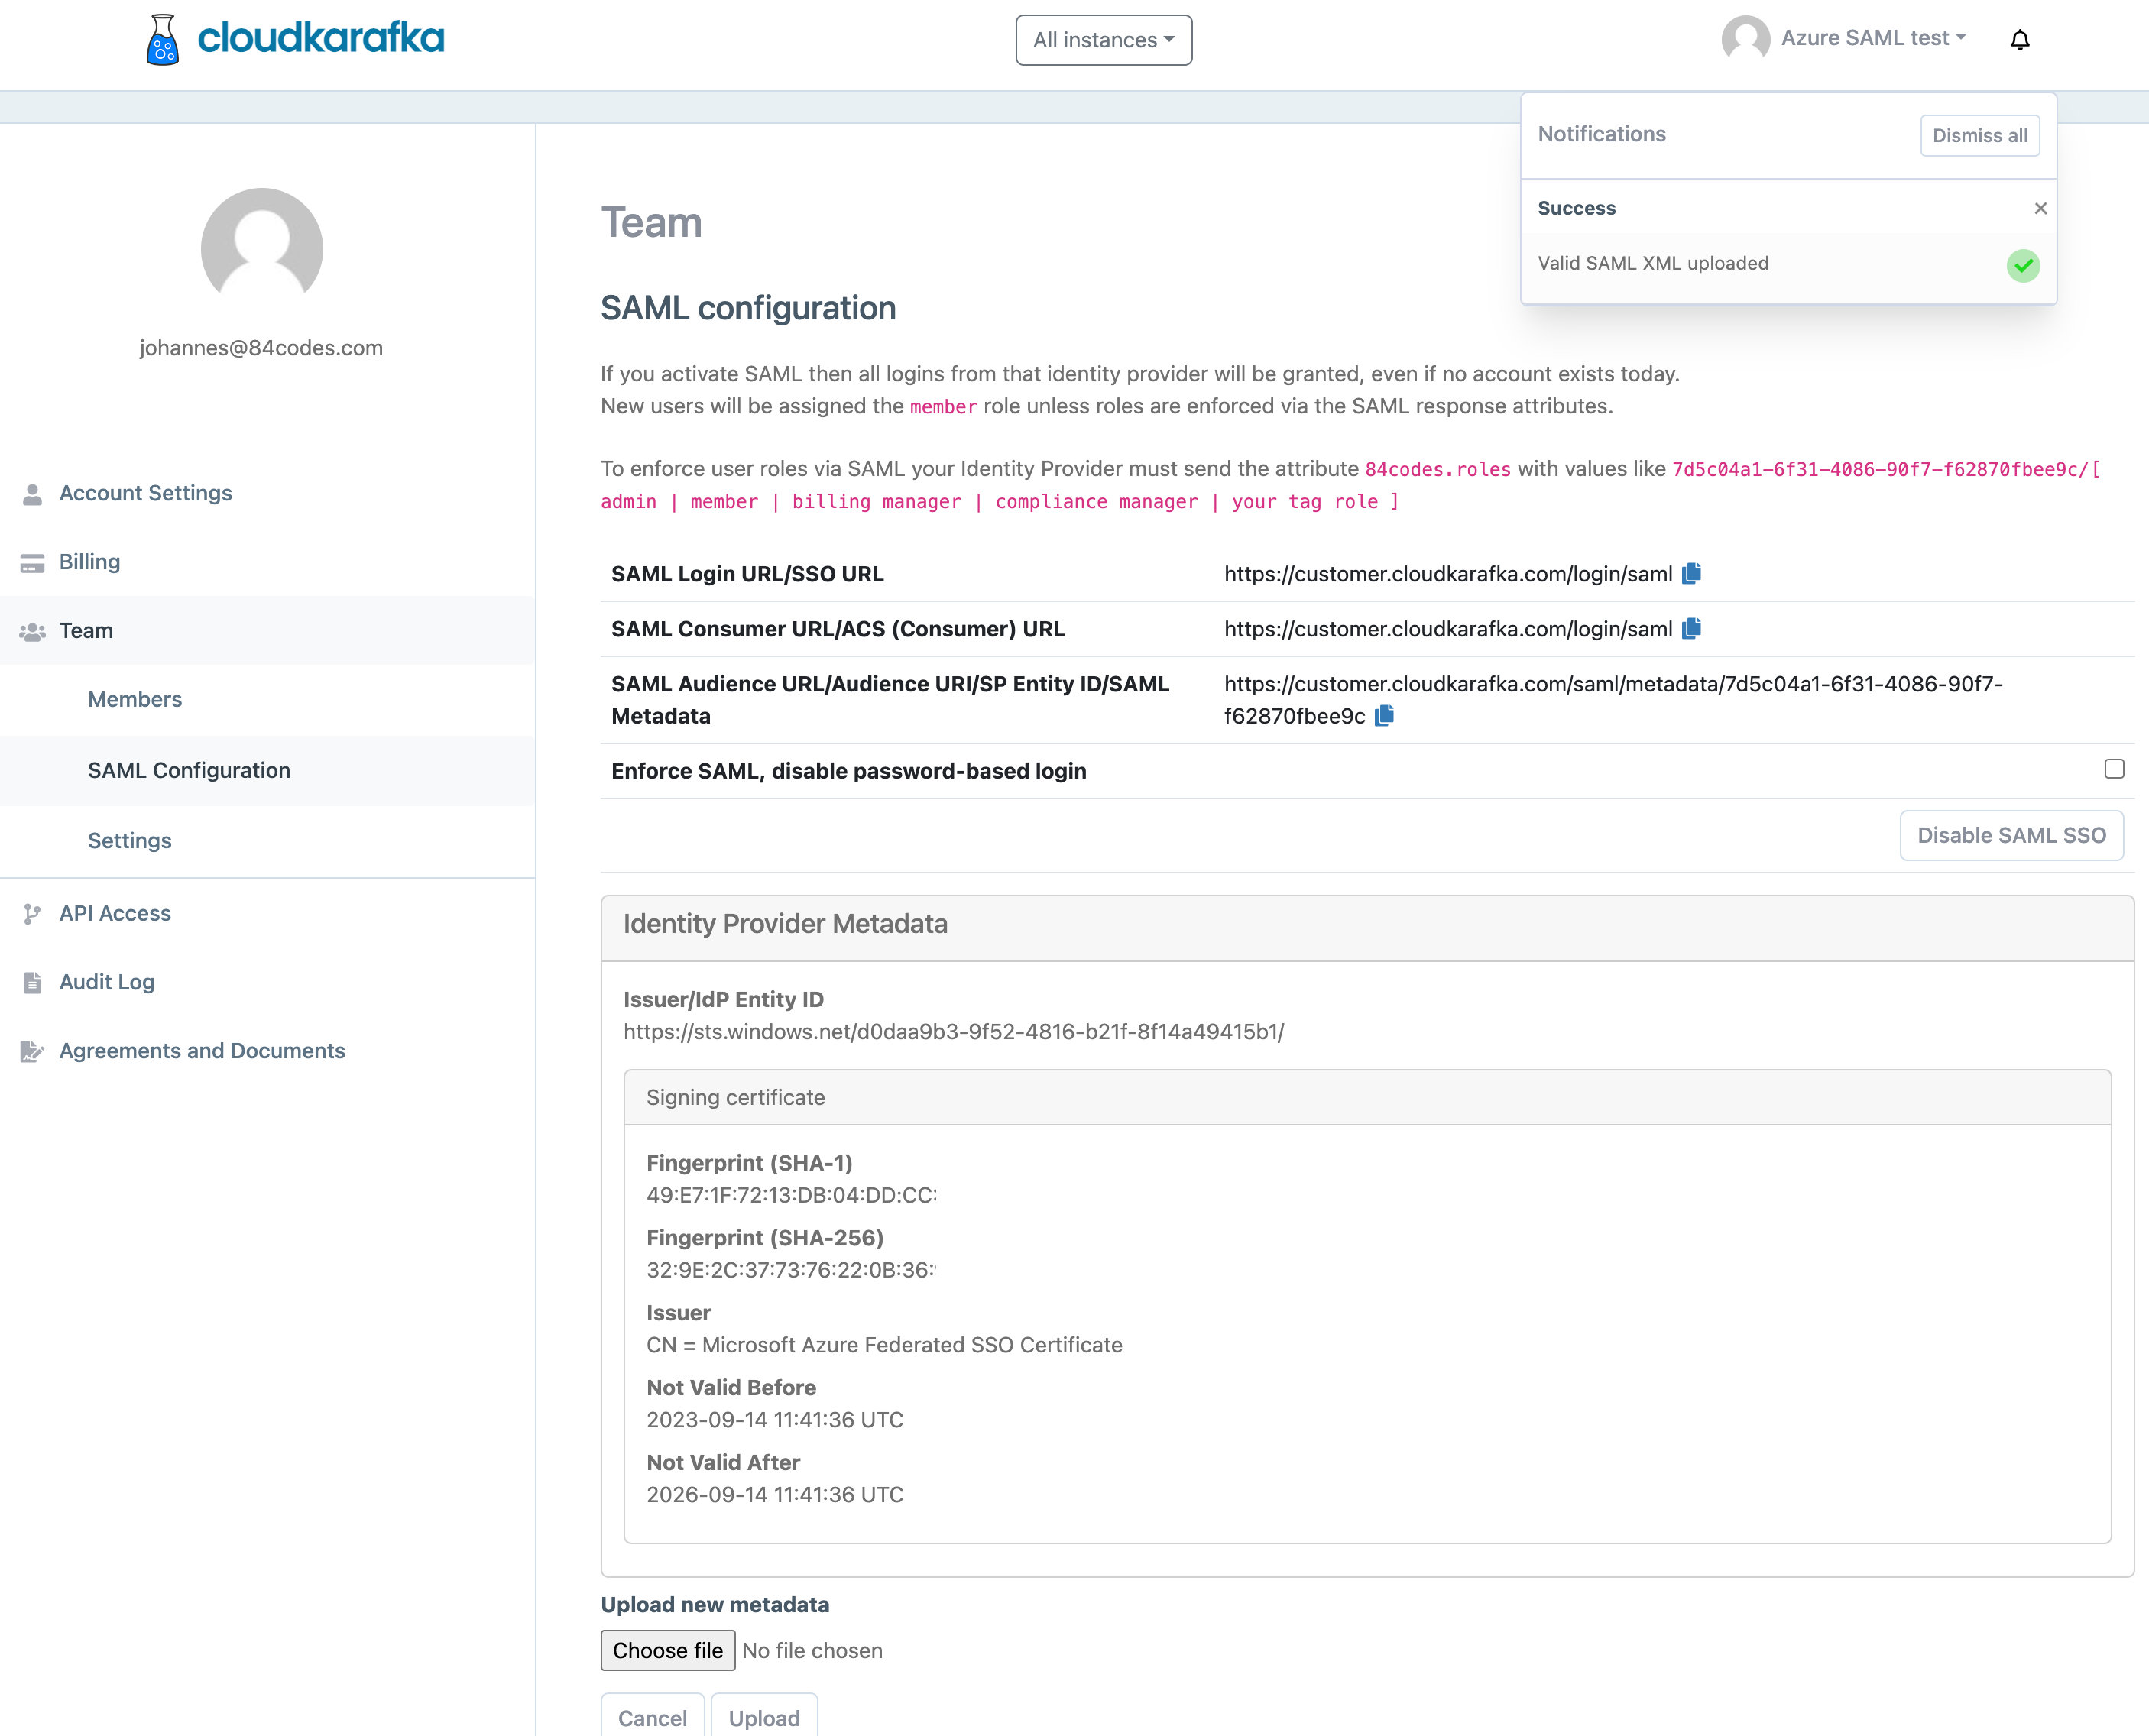
Go to https://customer.cloudkarafka.com/team/saml where SAML is configured in the CloudKarafka console, click “Choose file”, pick the file and click upload.
If successful a notification saying Success will be seen and the IdP Metadata will be displayed.
-
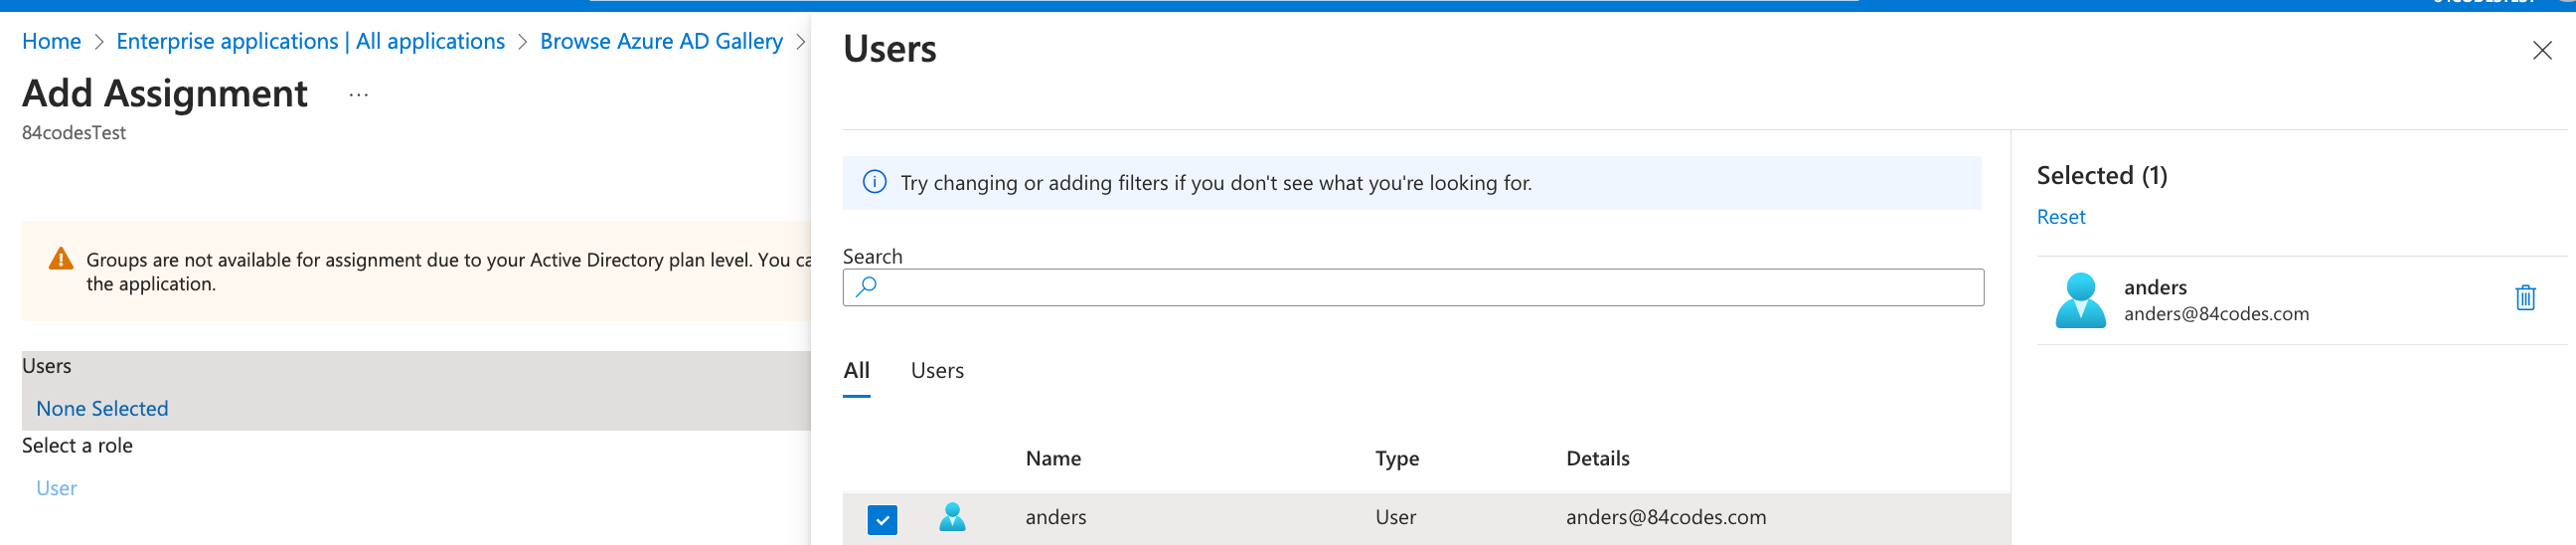
Add users and/or groups that should have access using Users and Groups in the side bar and click “Add Users/Group”
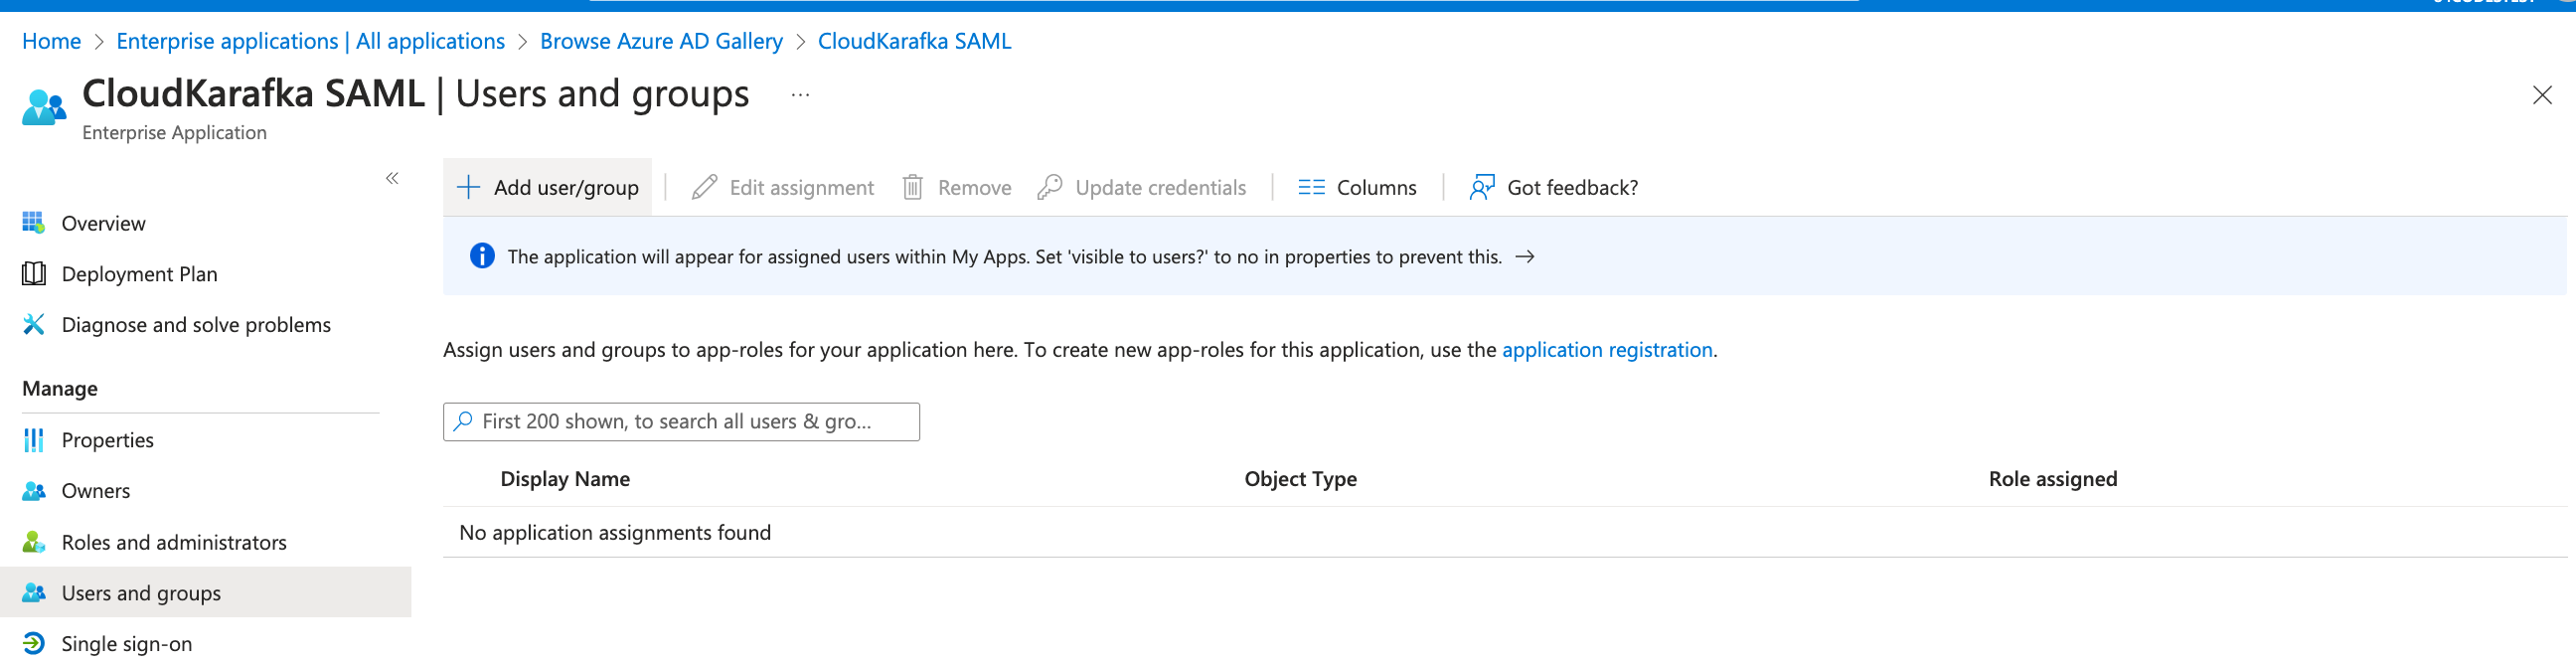
-
Click under Users and choose who should have access to CloudKarafka from the list. Click select followed by Assign, once done.
-
Enforce user roles via Azure SAML (optional)
-
Open the application, click single sign-on, and click the pen symbol at the User attributes and Claims section
-
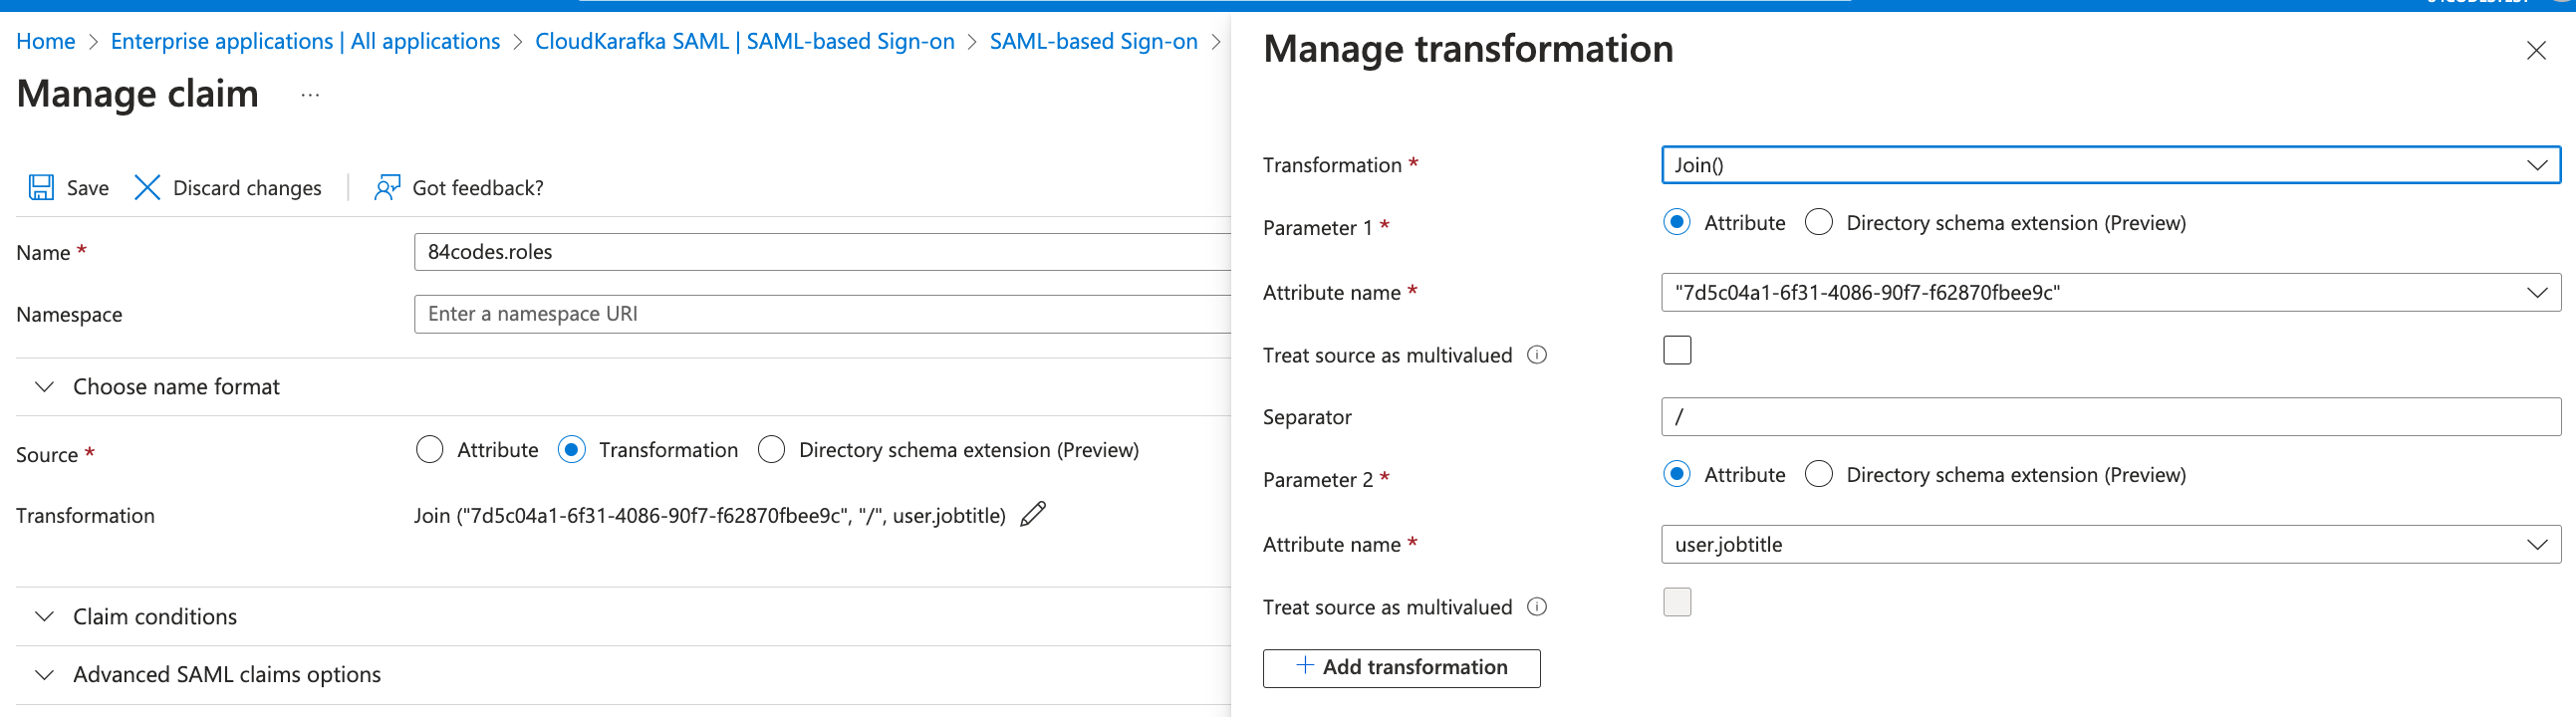
Click Add new claim and enter the following
- Name: 84codes.roles
- Source: Transformation, this opens the Manage Transformation sidebar:
- Transformation: Join()
- Parameter 1: Attribute
- Attribute Name: Enter the key found at https://customer.cloudkarafka.com/team/saml
- Separator: "/"
- Parameter 2: Attribute
- Attribute name: select user.jobtitle, or any field from the Azure user profile you wish to use to specify the CloudKarafka role to assign.
- Note: Azure is adding the “” automatically, make sure these aren’t duplicated.
- Click Save
- Click save to save the Claim
- Go back to your application and click Users and Groups. Select a user and click Edit Properties. In the field chosen previously (i.e. Job title), enter any of the roles specified at https://customer.cloudkarafka.com/team/saml
-
Google Workspace - SAML login on CloudKarafka
-
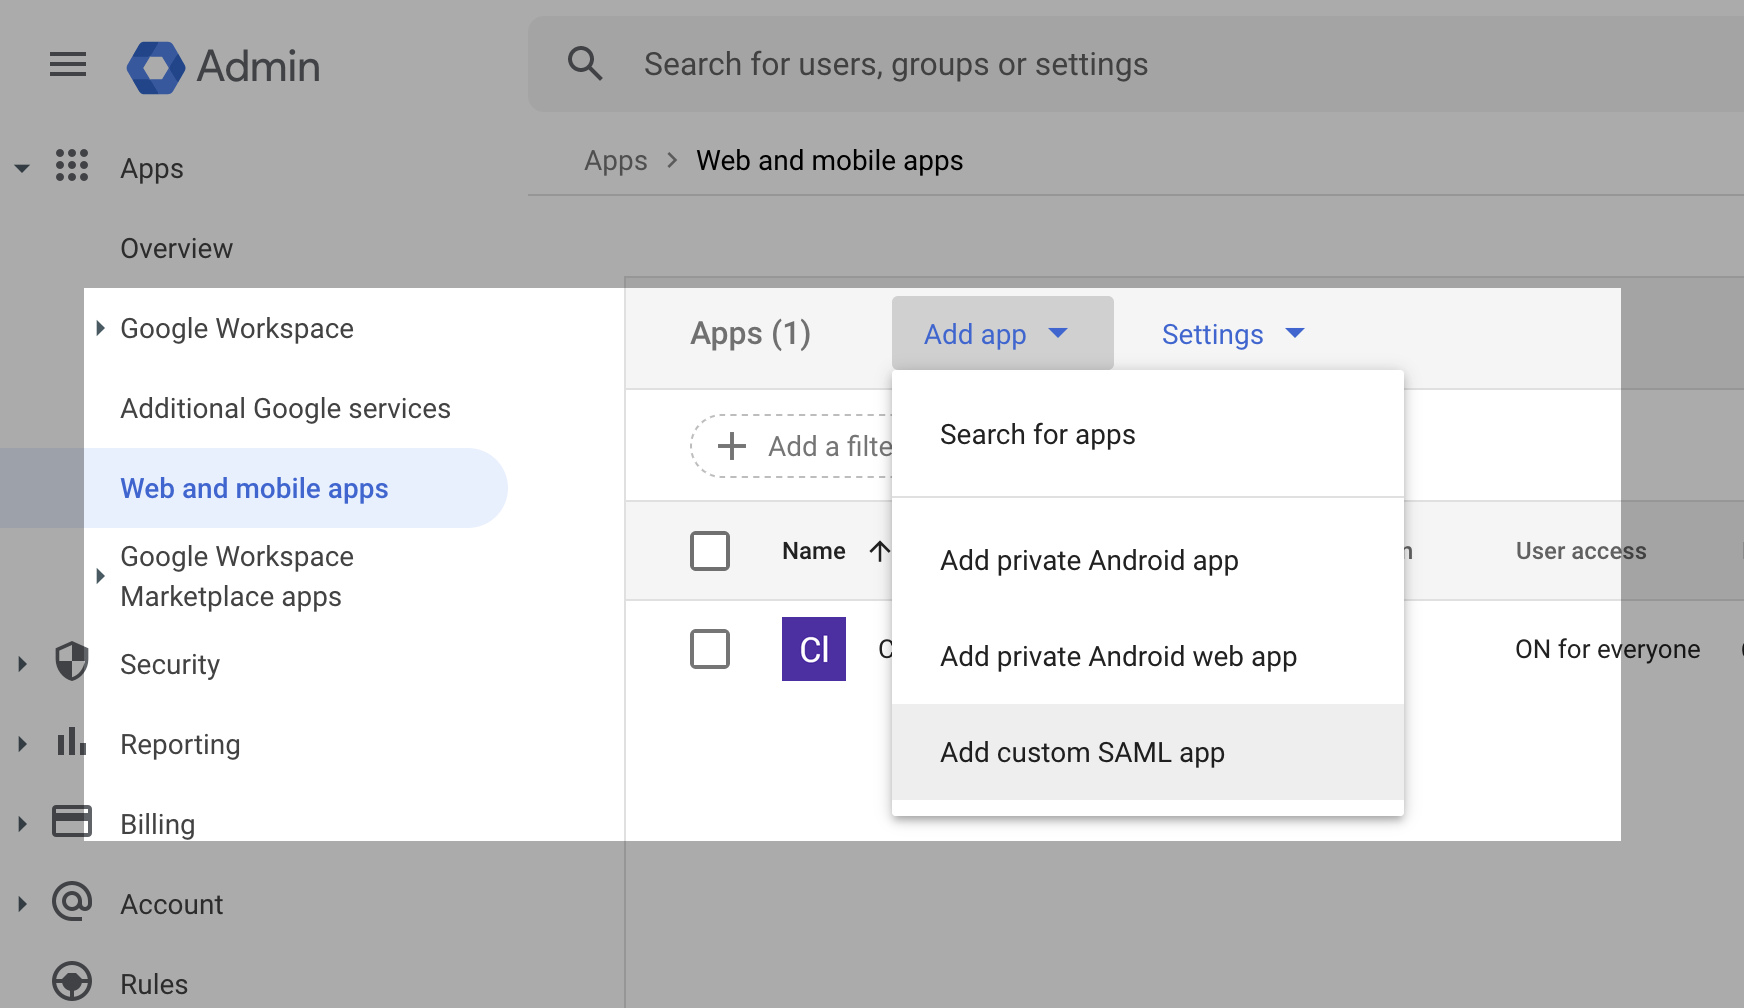
Using a Super Administrator account, Navigate to Apps > Web and Mobile Apps.
-
Select 'Add new App' - Add Custom SAML app.
-
Give your new app a name and press 'Continue'.
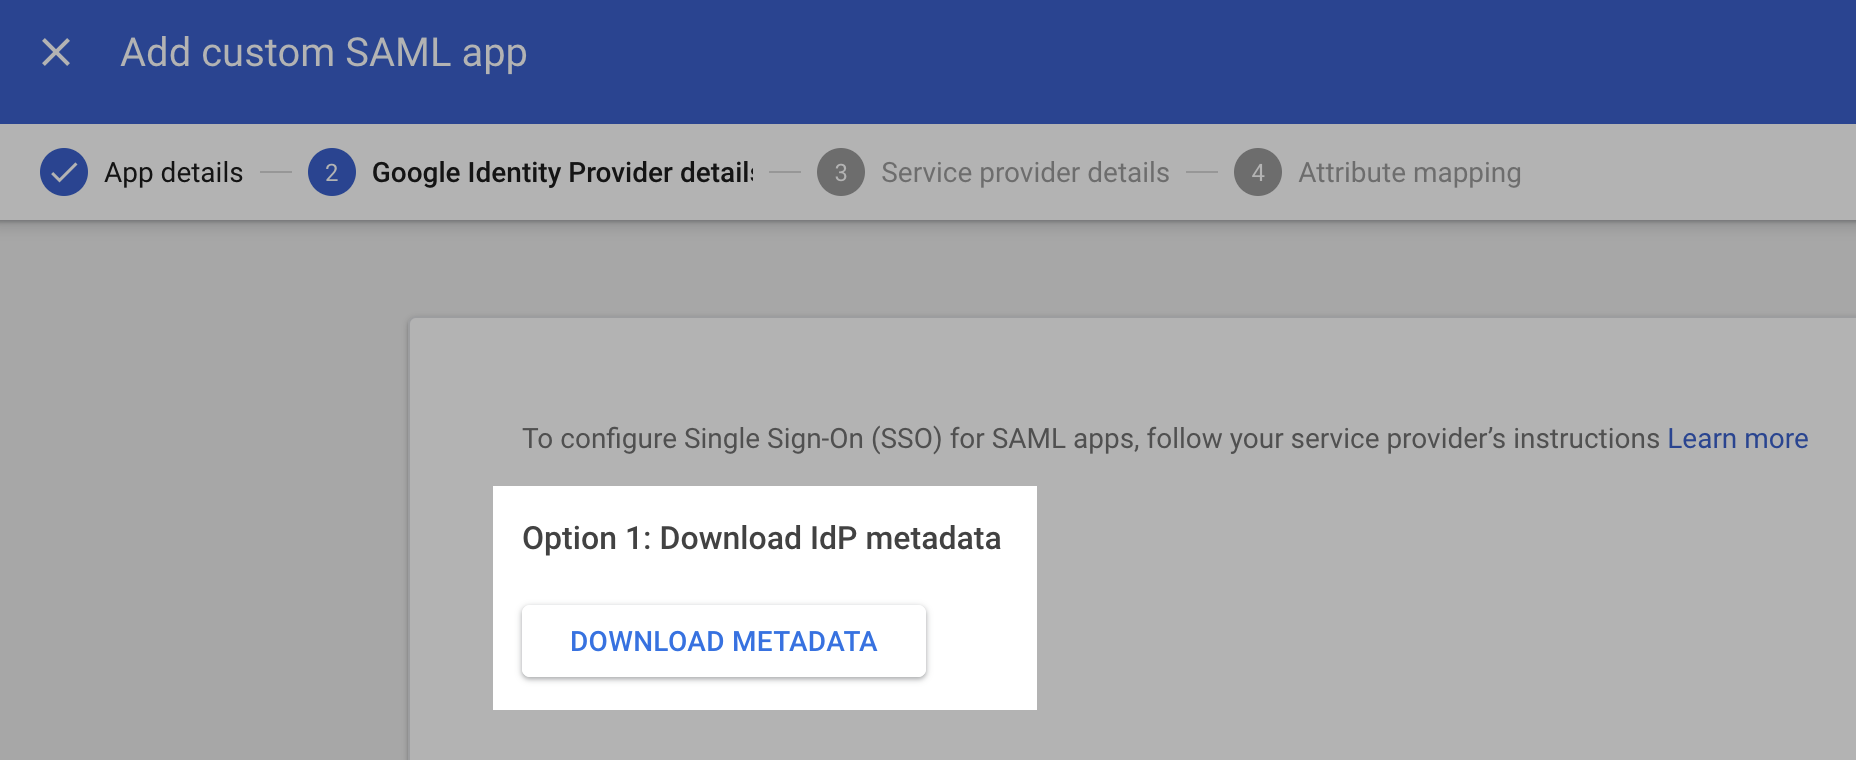
-
On the next screen, download IdP metadata. Once downloaded, upload this file to your Cloudkarafka console. In CloudKarafka, Navigate to Team Settings > Team > SAML Configuration and upload the IdP metadata file.
-
On the next screen in your Google Workspace setup, paste the SAML Consumer URL/ACS (Consumer) URL from your CloudKarafka console to the ACS URL field. For EntityID, paste the SAML Audience URL/Audience URI/SP Entity ID/SAML Metadata value. Select EMAIL as Name ID, and leave the rest as-is.
-
Press Finish. Now assign the app to a user and they will be able to sign in. The first login will have to be performed from the Google Workspace app dashboard (9 points menu).
If you need assistance or have any questions you can get in touch with support through support@cloudkarafka.com